Project Groups
This is an old version of the article. Please check the actual version in our new Knowledge Base.
Project Groups
- Overview
- How do Project Groups work?
- How to get access to the Project Groups?
- How to use Project Groups?
- Groups tab
- Group page
- Finances
- Add a group
- Link a project or quote to the group
- Unlink a project or quote
- Delete the group
Overview
Project Groups is a new feature of the XTRF Home Portal that allows collecting several projects and quotes in one entity. Grouping projects is especially beneficial to Project Managers as it helps to:
- monitor complex orders with a lot of linked subtasks
- manage long-term projects with a predefined budget
- keep track of finances on a higher level.
How do Project Groups work?
In a nutshell, you just add the selected projects and quotes to a group. This won’t affect the projects or quotes themselves but will allow you to manage and monitor several projects as one entity.
How to get access to the Project Groups?
To enable the Project Groups feature, please contact our Help Desk or your Customer Success Manager.
By default, the Project Groups feature will be accessible to all the user groups with the rights to access the Projects domain. To learn more about groups and rights settings, see the Adding a New User Account in the Home Portal article.
How to use Project Groups?
Groups tab
Go to the Projects module. In the Groups tab, you will see the list of existing groups along with their status and financial details. Use the filters on top of the list to narrow it down or search for a particular group.

You may also edit the view or create a new one. To learn more about views, see the Creating and Modifying Views video.
To enter the selected group, click on its line in the list.
Group page
Each group has its own page where you can see its status and assigned categories, related clients, financial statistics, and linked projects and quotes.

On the group page, you can:
- Change the group name.
Note: You can’t change the group ID. However, you can configure the numbering scheme for project groups inConfiguration menu > Templates > Numbering Schemes.
- Add and remove clients in the Client card. Each group must have at least one client assigned. To add a client, click the + icon. To remove a client, click the x icon.
Note: Clients are not imported automatically from linked projects and quotes. Therefore, adding or deleting a project or quote will have no impact on the Client card and vice versa. - Add or edit notes in the Notes card.
- Change the group status. The status can be:
- Open (you can add projects and quotes, edit clients and finances)
- Closed (you can’t make any changes to the group).
- Add categories. You can create categories that will be specific for groups and use them to sort and mark your groups in
- Change the group currency. Click the
icon in the top right corner and then the Change Group Currency button.
Note: The default currency is the base system currency of the Home Portal. All currency changes are made according to the latest data from the Open Exchange Rates service. All the amounts in project groups are calculated dynamically based on the actual exchange rate; therefore, the numbers may vary daily. To learn more about exchange rates in XTRF, see the Currency Rates Synchronization article. - Set the budget for the group. To add or change the budget, click the
icon in the top right-hand corner of the Budget Usage section and provide the sum.
- Enter linked projects and quotes by clicking on their lines in the corresponding tables.
Finances
The financial data of the group is collected automatically and shown in five sections:
- Total Payables
- Total Receivables
- Profit (calculated as total receivables minus total payables)
- Margin (calculated as profit divided by total receivables, multiplied by 100)
- ROI (calculated as profit divided by total payables, multiplied by 100).
The numbers are displayed in different colors:
- Red - for negative profit or margin and ROI less than 10%
- Orange - for 10-20% margin and 10-30% ROI.
- Green - for positive profit, margin more than 20%, ROI more than 30%.
The budget bar also changes color depending on the usage: green for up to 79%, orange for 80-89%, and red for over 90%.
Note: quotes are not included in the financial statements.
Add a group
To create a new group:
- Go to the Projects module > Groups tab, and click the Add Group button.
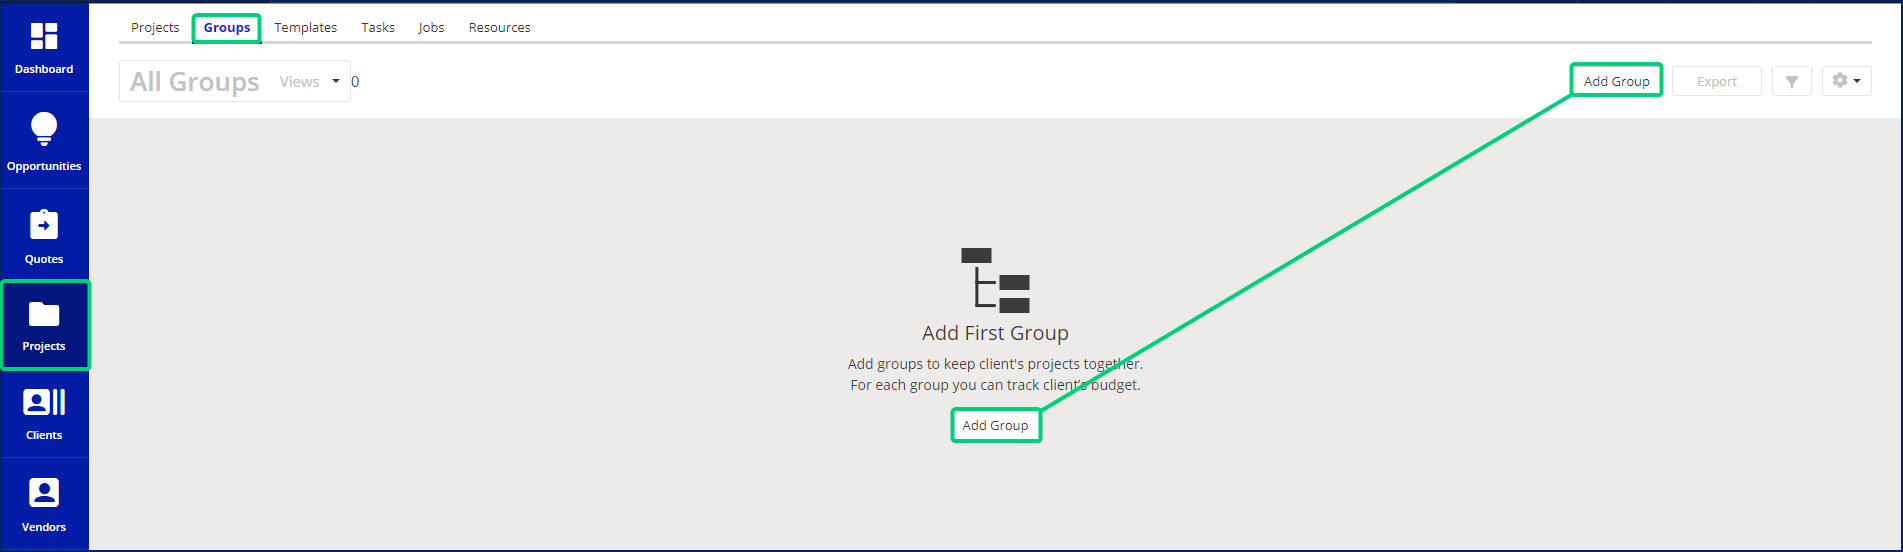
- You will be directed to the Add Group page.
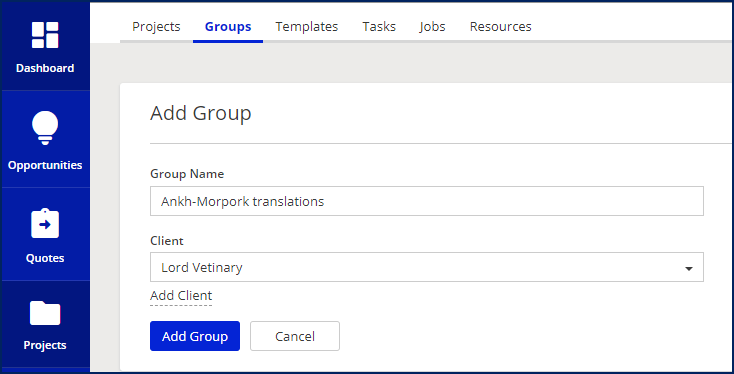
a. Provide a Group Name.
b. Select one or several clients from the Client drop-down list.
3. Click the Add Group button. You will be directed to the newly created group page.
Link a project or quote to the group
You can link projects and quotes to an existing group in two ways: on the group page or while creating a project or quote.
On the group page:
- If there are no linked projects or quotes, click the Link Project button in the middle of the screen.

- If this group already has linked projects, a Link Quotes button appears under the Linked Projects section.
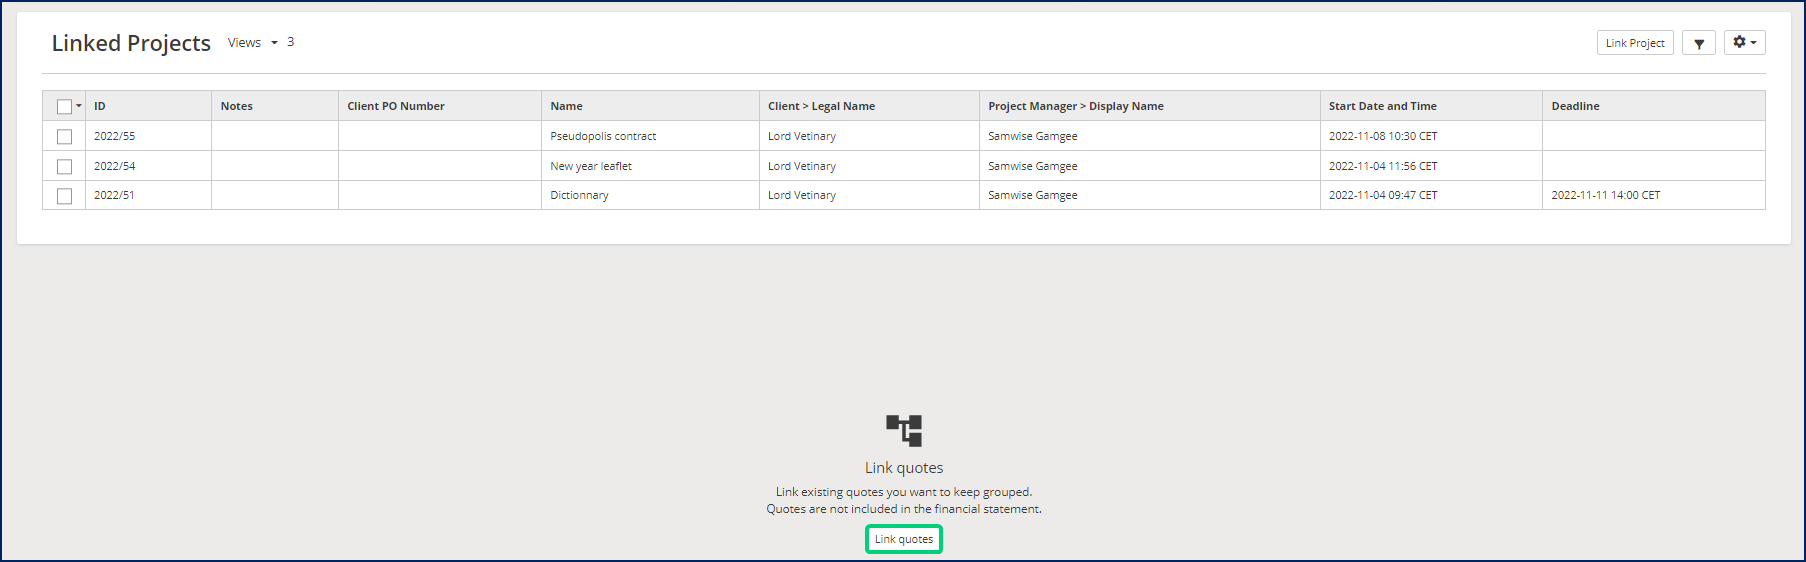
- If this group already has linked projects and quotes, click the Link Project or Link Quotes buttons in the corresponding sections.

After you click the Link Project or Link Quote button, a pop-up window with a list of projects or quotes appears.
- Check the box(es) in the left column to select the desired project(s) from the list. To narrow down the list, click the
icon and use the expanded filters.
- Click the Link button.
On the Add Project/Quote page:
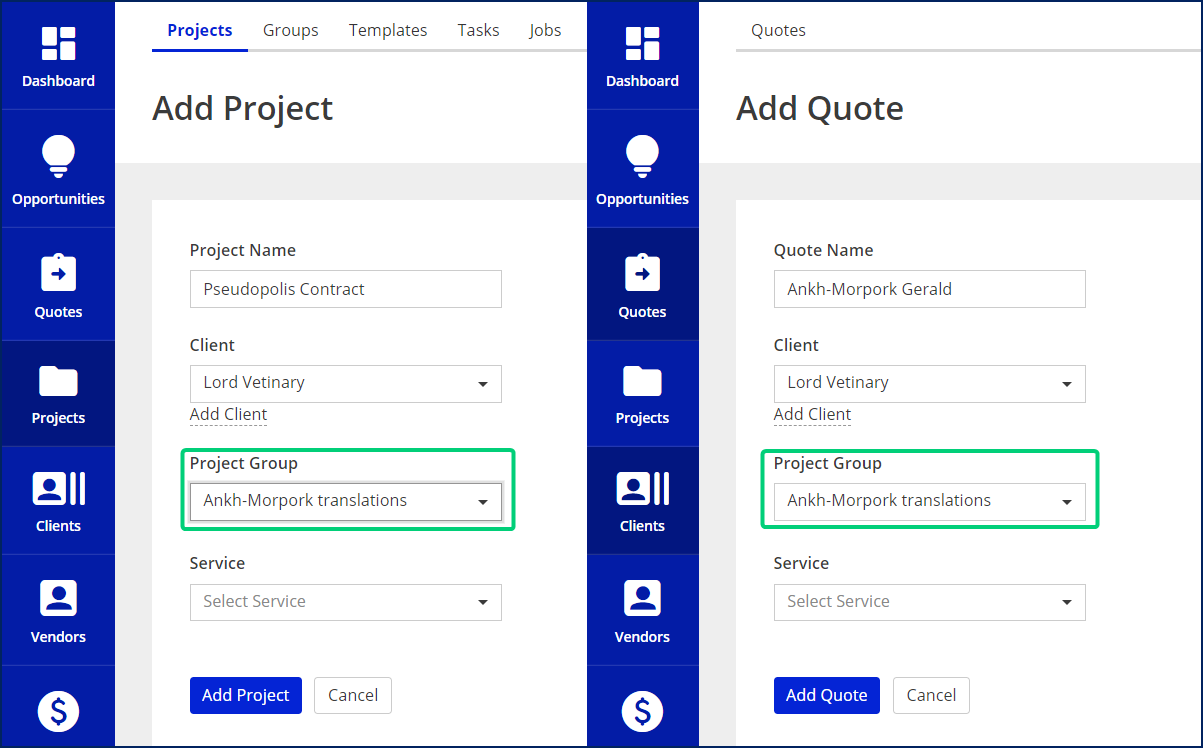
- From the Project Group drop-down menu, select the desired group.
- Click the Add Project / Add Quote button.
Note: You need to select a client for the project or quote before assigning it to the group. The client must be already assigned to the desired open group.
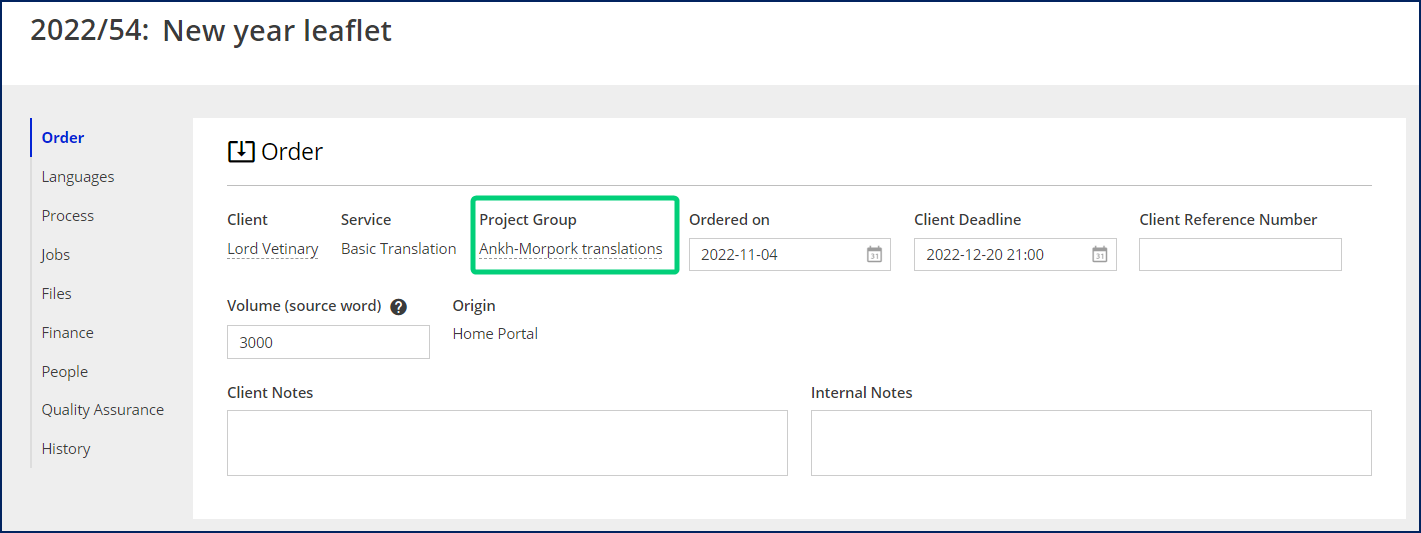
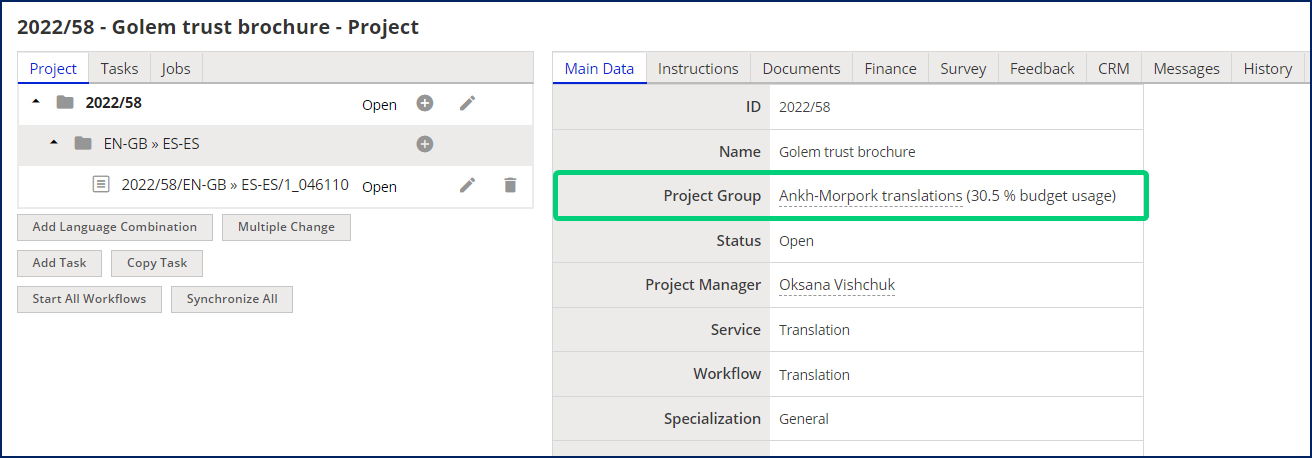
Tip: to check if a project is already linked to a group, see the Order card for Smart projects or the Project > Main Data tab for Classic projects.
Unlink a project or quote
To delete the association of a project or quote with a group, go to this group page. Select the desired project or quote in the Linked Project/Quotes sections. The Unlink Project/Quote buttons will appear on top of the project/quote list. Click this button and confirm the unlinking.

Delete the group
To erase the group from your system:
- On the group page, click the
icon in the top right-hand corner and select Delete.
or
- In the Groups tab, select the group in question and click the Delete button that appears on top of the list.

Note: Deleting the group will affect the group entity only. The linked projects and quotes won’t be deleted. The Project Group field will disappear from the project’s and quote’s Order card or Main Data tab.
Tip: To keep track of the projects and quotes linked to certain groups, configure your smart views in the Projects and Quotes modules by adding the Linked to a Group filter and the Group>Name column. To learn how to configure the Smart views, see the Creating and modifying views lesson of the Advanced Project Management with Smart Projects course of the XTRF Academy.

Customer support service by UserEcho
