Practical use of Categories on Clients, Vendors and more
Categories are a convenient way to label your Clients, Vendors, Projects etc. They help you filter, search and report on various items in your database.
Categories can be defined freely by XTRF admin users. Unlike other System Values, more than one Category can be assigned to an item, to increase the precision of your database. For example, a Vendor might be labeled with three (or more) Categories: "trusted by Company X", "certified" and "works on Sundays".
Categories are defined for a specific scope. This means that you can have a different set of labels for your Clients, Vendors etc. For example, client category "VIP Client" (if this is what you define) will not be applicable to Vendors.
Categories are also applicable to Quotes, Projects and Invoices, giving you flexibility to describe them with more than standard attributes. For example, you can define your own reasons for rejecting quotes: "too expensive", "not interested", "chose our competitor" and so on. Another example is labeling projects, so that they stand out from the crowd: "strategic project", "charity - don't invoice", "test project for new client" and many more.
How to define your own Categories
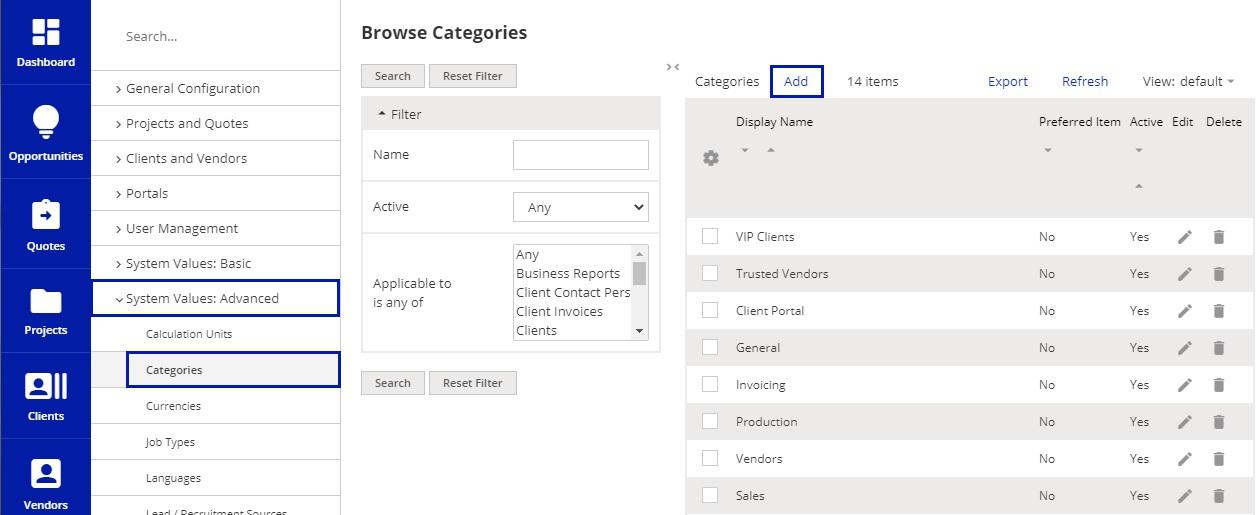
1. Go to ![]() Configuration > System Values Advanced > Categories.
Configuration > System Values Advanced > Categories.
2. On the list you will find a number of default Categories. Feel free to use, edit or delete them.
3. Use the Add button on top of the list.
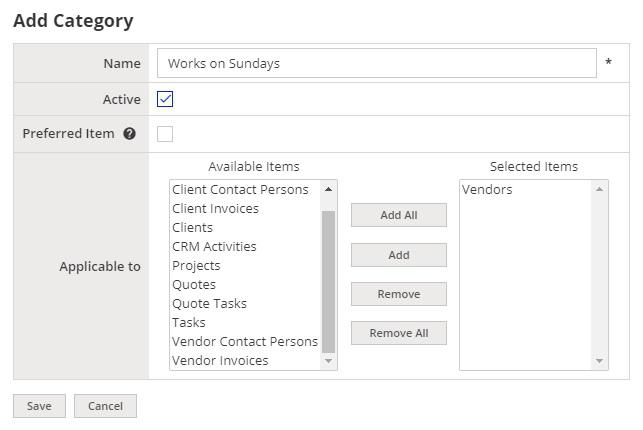
4. Name the category, click on the items in the left column you'd like the category to be applicable to, and click on Add. The selected items will appear in the column on the right. then Save to apply.
How to apply Categories
After saving you can already start using the new Category.
1. Go to an item it describes (Quote, Task, Vendor / Client Profile etc.) Usually the Category can be found in the 'Main Data' tab.
2. You can apply multiple Categories per item (in this case - Vendor) by simply choosing them from the dropdown list.
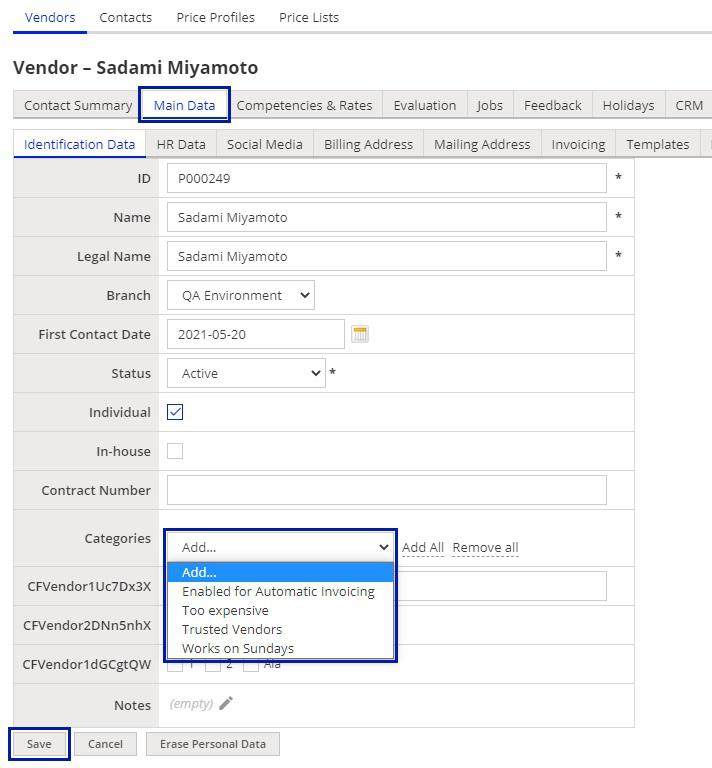
3. Save to apply.
Applying Categories by Multiple Change.
Vendos, Clients, Contact Persons, Invoices, as well as Classic Quotes and Projects can be changed by Multiple Change action.
1. On the list (this case Clients) pick at least one item.
2. Use the button Multiple Change, which appears only when you select items on the list.
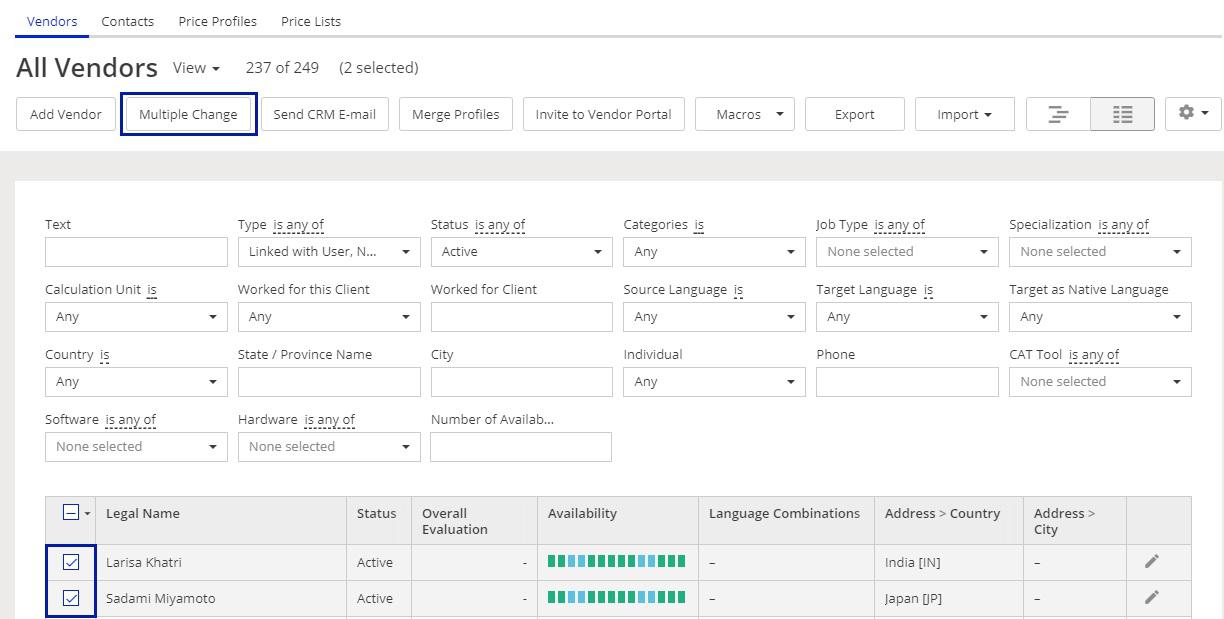
3. On the list of available actions find 'Categories' and Add desired items.
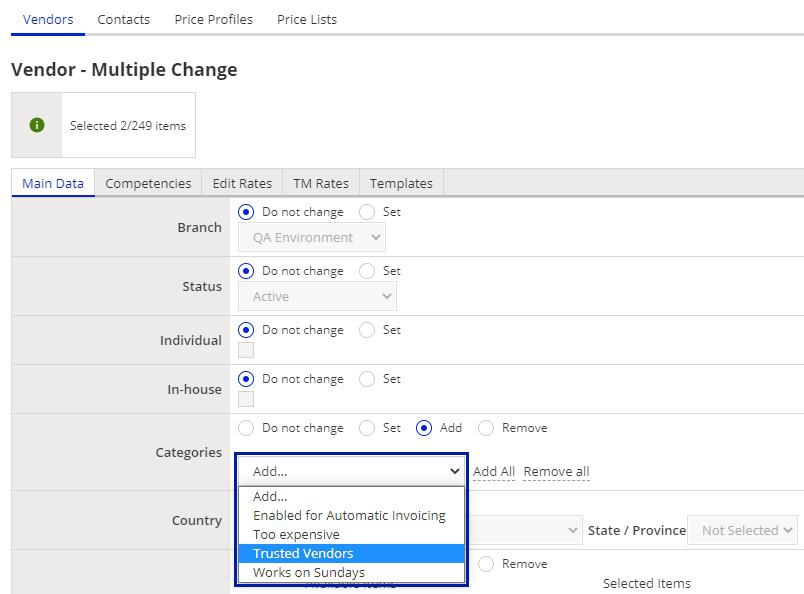
4. Continue the Multiple Change at the bottom of the screen using the Next button at the bottom.
Categories in practice
Categories are primarily used to look up the desired items. Any browse will host Categories filter.
If you can't see it in your browse, you can edit the view and add the filter. Learn how to manage views in the XTRF Academy.
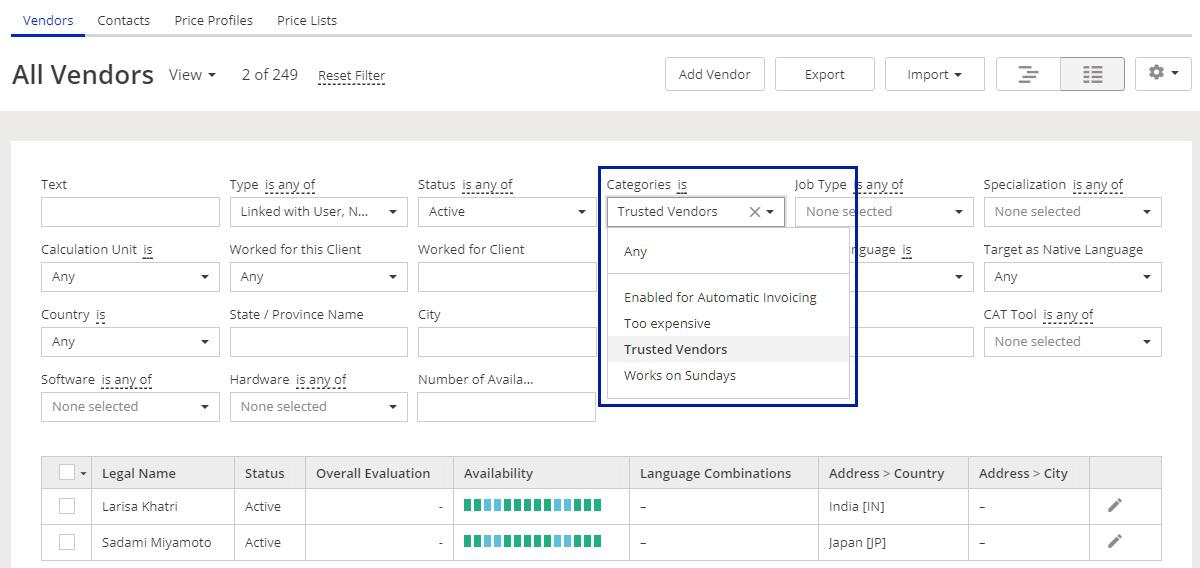
Categories can also be used within specific browses, like Selecting a Vendor for a Job.
In such a case, you can use Categories in addition to basic filtering (for competencies matching the context) or instead of usual filtering.
Another application of Categories is when you want to look up projects for clients of certain Categories, or Jobs by vendors with specific Categories to see the respective values.
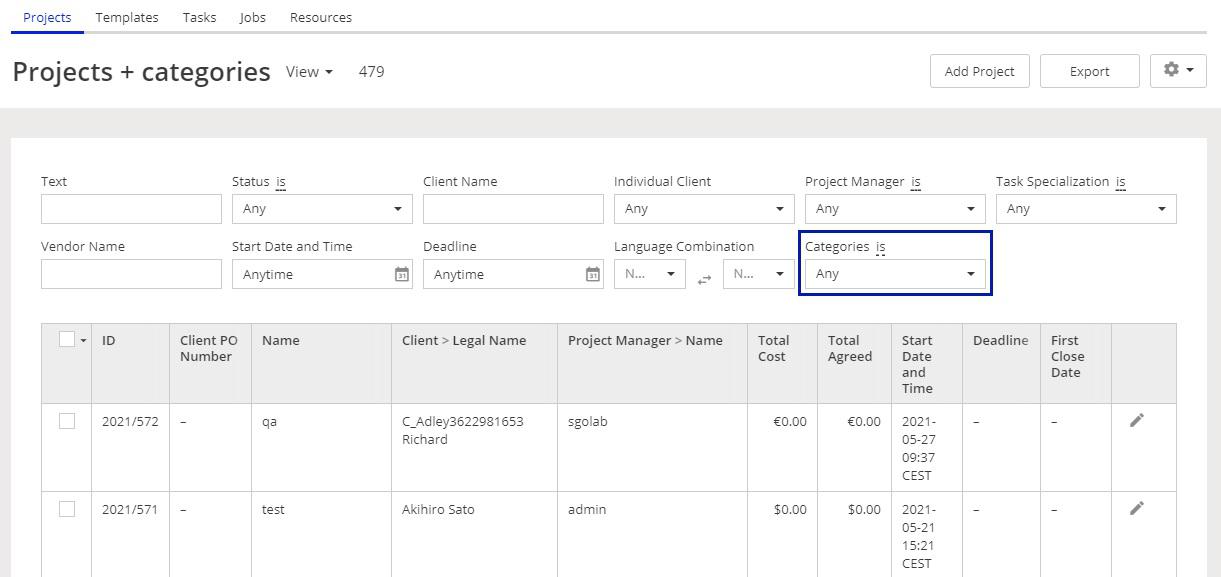
In those cases, it is important to use the right filter. Notice that both Projects and Jobs can be assigned their own Categories. When configuring filters, make sure you use the correct one - of clients / vendors vs. projects / jobs.

Notice you can search for single, or multiple Categories. You can change the behavior of the filer when editing the view.

FAQ for this topic
- Can the Categories be seen by the Clients and Vendors?
- No. They are never visible to anyone else, but the users of your Home Portal.
- Can the Categories be use in the Vendor Portal?
- No. They are only usable in the Home Portal.
- What happens if I delete the Category?
- It's gone. The items bearing this Category lose it too.
Customer support service by UserEcho
