Utilizing macros in XTRF
This is an old version of the article. Please check the actual version in our new Knowledge Base.
Automate tedious processes by applying macros in XTRF.
What are macros?
The word “macro” is short for “macro-instruction”. It is basically a long instruction that users can apply to save time on repetitive tasks like long input sequences of keyboard and mouse actions or reusing code. Macros take the form of programming scripts. In XTRF, they’re most commonly used to export data, modify custom field values or alter database entities, but possibilities are virtually unlimited.
Macros in XTRF
Go to the Configuration menu > Integration > XTRF Macros, where you can filter, open, and add new macros.
To add a macro, click on Add to be transferred to the creator page.
First, fill out the Options section.
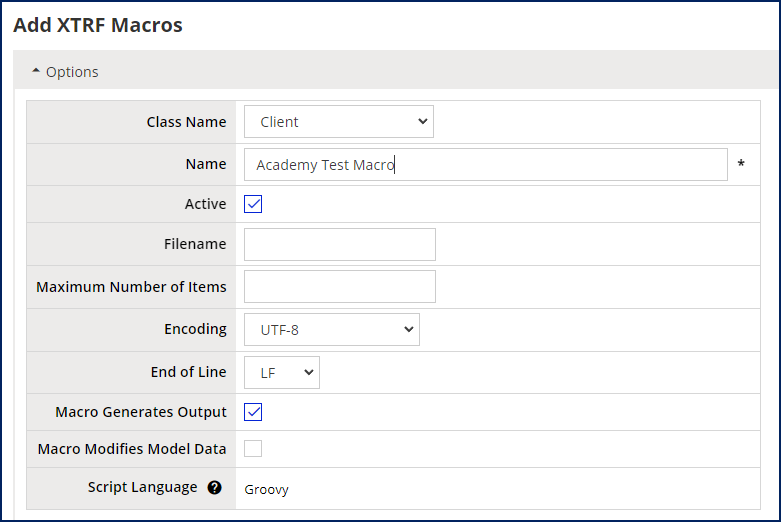
- In the Class Name section, specify the scope the macro will work on e.g., Projects, Clients, Jobs, Invoices.
- Name the new macro.
- If the macro is to generate an output file, provide its name in the Filename field, along with the file extension, e.g., “Output.csv”
- Check the Macro Generates Output box if you want this macro to generate an output file.
- Check the Macro Modifies Model Data box if you want the macro to modify data in the system, e.g., change job assignments. Leave it unchecked if you only want to export data or create reports.
Then tailor the editor options.
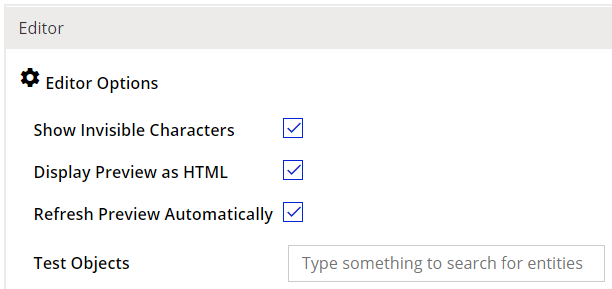
- You can search for database entities, and the macro will be executed for these test cases.
- Your output or return value will be displayed in the preview window. Click on the arrow to refresh the view.
- This window contains the actual code of the macro.
Controlling access to macros
Administrators can limit access to certain macros to particular groups of users. This solution has been introduced to eliminate the potential risk of errors and system malfunctions if the complete list of macros is available for all users to browse and run.
If you’re an administrator, go to Configuration Menu > Integrations > XTRF Macros. Add a new macro, or open an existing one, and scroll to the ‘Permissions’ section.
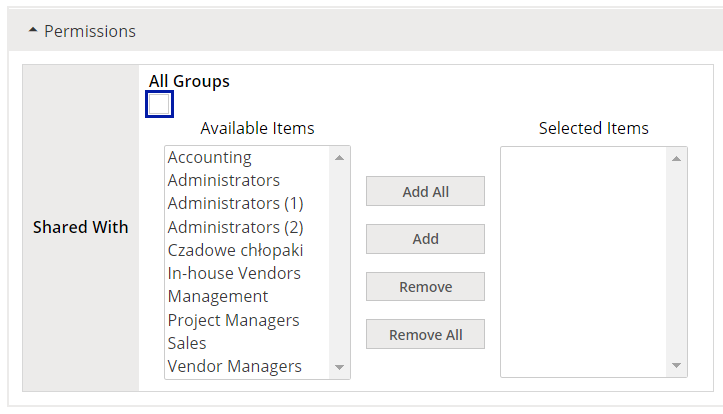
‘All groups’ checkbox is selected by default. If you want to restrict access to the macro, uncheck the box, and select the groups you want to grant access to.
If they’re not within the selected group, they won’t see the macro on the list and won’t be able to run it, including through the API. Also, inactive macros do not appear on anybody’s list.
Note
User groups with ‘Edit’ rights to macros can still browse and modify all macros through the configuration menu. This includes changing the permissions to run macros.
Groovy programming language
XTRF utilizes Apache Groovy as a programming and scripting language for macros. Powerful, optionally typed, and dynamic, it’s best compatible with the Java platform with its static-typing and static compilation capabilities, as well as concise and easy-to-learn syntax.
For full Groovy macro documentation, click HERE.
A simplified XTRF guide with a practical example (exporting .csv files) is available at the bottom of this article.
Note
XTRF also recognizes Apache Velocity as a programming and scripting language, but this feature has been deprecated and soon will be discontinued.
Running macros
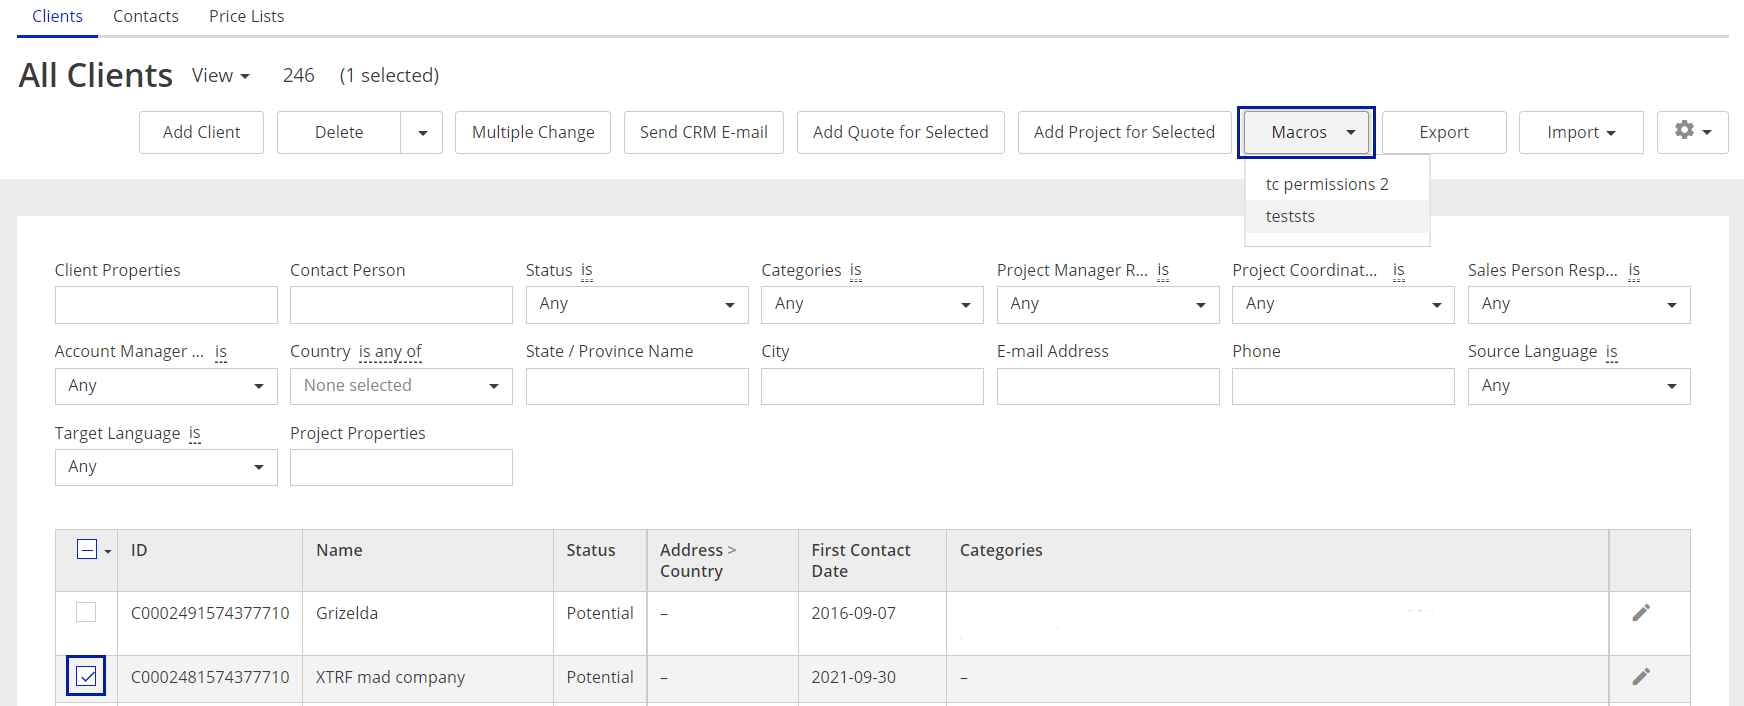
- Go to the browsing view of the class you want to run the macro for (like the list of Clients, Vendors, Projects, Invoices, etc.).
- Check the boxes to select the items from the list.
- In the menu above the browsing list, click on the Macros drop-down menu, and select the macro you want to run.
Note
If there are no macros for the desired class in your XTRF platform, the Macros drop-down menu will not appear in this class’ browsing view.
A simplified XTRF guide to macros
Customer support service by UserEcho
