Managing Services
This is an old version of the article. Please check the actual version in our new Knowledge Base.
Services are basically predefined sets of Processes. They are system values representing your processes in business language. In other words, for your
clients the Services replace the Processes behind them.
In XTRF, in order to start a Project, you need to choose a Service upon which it is going to be based. There are three default Smart Project Services:
- Basic Translation: contains Translation and Proofreading Steps
- Standard Translation: contains Translation, Editing and Proofreading Steps
- Premium Translation: contains File Preparation, Translation, Editing, Proofreading and DTP Steps
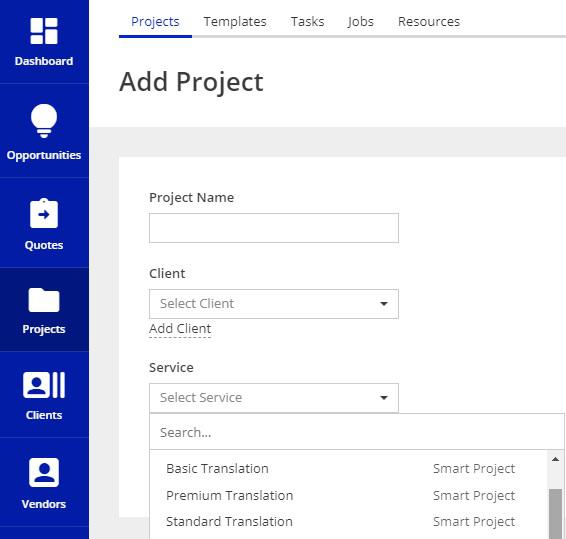
If the default Services do not meet your requirements, you can customize them or set up your own Services. For example, you can customize your Services to meet the needs of a particular client. For different clients the same Service could be configured in a way that it follows a different Process.
Make sure that you first define Process Templates that are represented by the Services.
Adding a new Service
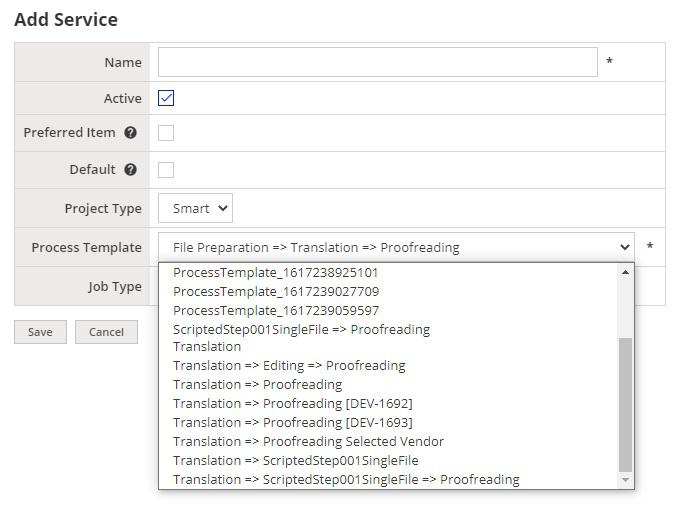
To add a new Service:
- Go to
 Configuration menu > System Values: Basic > Services. Browse Services display appears.
 - Click Add to create a new Service. Add Service display appears.
- In the Name field, enter the name of the Service. The name should be unique.
- Check Active option to make the service available for selection in Home Portal and Customer Portal (if enabled).
- (Optional) Check Preferred Item option if you want to display this Service at the top selection lists.
- (Optional) Check Default option if you want to select this Service by default when adding new entities.
- From the Process Template drop-down menu, select a Process Template to use in this Service.
- From the Job Type drop-down menu, select a Job Type associated with this Service. This will determine which rates from client Price Profile will be used to charge clients for this Service.
- Click Save and Exit button to save your changes and go back to the Browse Services display.
Services in Customer Portal
Services can be presented to your clients in Customer Portal. While ordering a project through the Customer Portal, your clients will be able to choose one of the available Services - see the request form below.
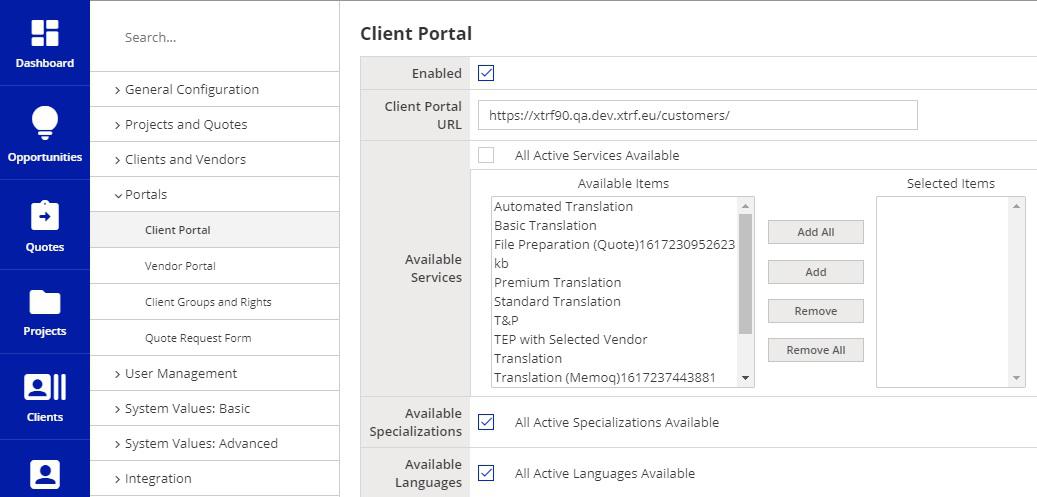
You can decide which of your Services are available to your clients in their Customer Portal. To do this:
- Sign in to the Home Portal of XTRF Platform.
- Go to Configuration menu > Portals > Customer Portal > Edit button at the bottom of the display.
- In Available Services section select which services should be available in the Customer Portal.
- Check All Active Services Available option, if you want to share with your clients all your Services with the status Active.
- Uncheck All Active Services Available option, if you want to share only selected Services. The Available Services section expands to show a multi-selection field. Use buttons in the center part of the section to move selected Services between Available Items and Selected Items columns. Alternatively, you can double-click the item that you want to move from one column to another. The Services listed in the Selected Items column will be available to choose from for the Customer Portal users.
- Click Save button at the bottom of the page to confirm your changes.
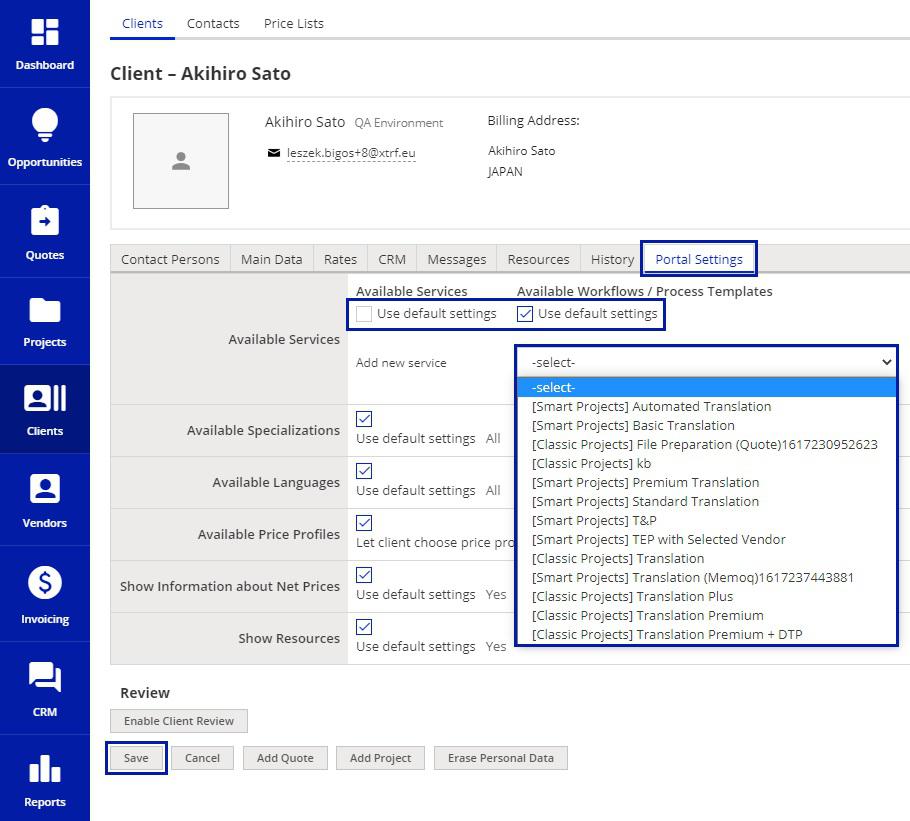
Regardless of the Services selected in the configuration of your Customer Portal, you may select the list of Services specially for a particular client. Moreover, you can modify the Process behind such client-specific Services to reflect your individual business arrangements. To do this:
- Sign in to the Home Portal of XTRF Platform.
- Go to Clients module.
- On the Clients browse display, select the desired client and click
 icon (alternatively, enter the desired client's profile and click Edit button).
 - Go to Portal Settings tab.
- In the Available Services section, uncheck the Use default settings option.
- From the Add new service drop-down menu select the Services that you would like to provide to this client. The Services are displayed with their default Process Templates.
- (Optional) If you would like to change the Service's default Process Template for a given client, uncheck the Use default settings option in the Available Workflows / Process Templates section. Now you can select from the drop-down menu which Process Template to use within this Service for this client. You can make such matching for each Service you have added for this client.
To remove a Service from the client's list, click the Remove button. - Click Save button at the bottom of the page to confirm your changes
Adding localized name to a Service
To add a localized name to a Service you need to edit that Service.
- Go to
 Configuration menu > System Values: Basic > Services. Browse Services display appears.
 - Click
 icon for the Service you want to modify. The Service's properties display appears.
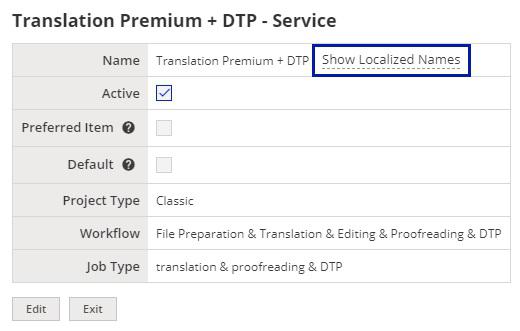
 - Click Show Localized Names. The Localized Name section appears on the Service's properties display.
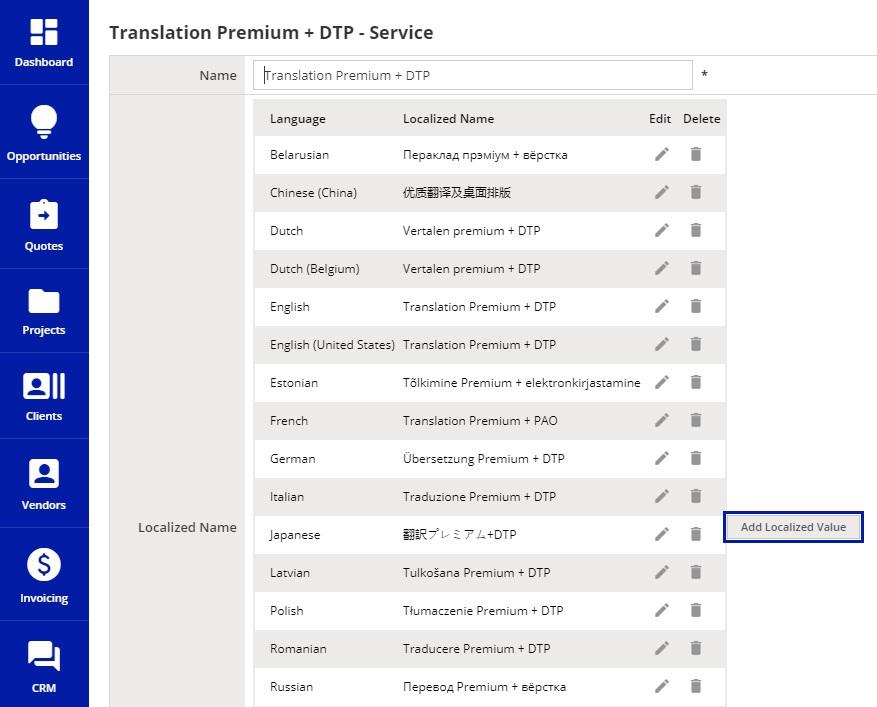
- Click Add Localized Value button. Add Localized Value pop-up window appears
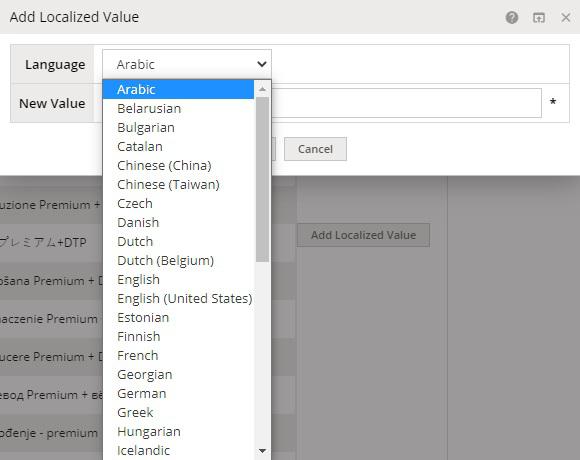
- From the Language drop-down menu select the required language.
- In the New Value field, enter the name of the Service in the selected language.
- Click Save button. The Add Localized Value window closes. The newly-added name is displayed in the Localized Name section.
- Click Save and Exit button to confirm your changes and exit the Service's properties display.
Customer support service by UserEcho

