Setting up Vendor Selection Rules
This is an old version of the article. Please check the actual version in our new Knowledge Base.
Vendor Selection Rule is a set of specific criteria used to automatically create a list of recipients for Job Offers. It's an alternative approach to manual Vendor selection for Job Offers.
With Vendor Selection Rules, Job Offers are sent in so-called Cascades. Each Cascade is a pool of Vendors matching the Rule's criteria. The properties of a Vendor Selection Rule determine how many Vendors to ask per Cascade, what the maximum number of Cascades should be, what the time interval between the Cascades is, and how the Vendors should be sorted in those Cascades.
Configuration
To create a Vendor Selection Rule:
- Go to Configuration menu.
- Go to Projects and Quotes > Vendor Selection Rules (Smart) or Vendor Selection Rules (Classic). Vendor Selection Rules menu appears.
Vendor Selection Rules (Smart)
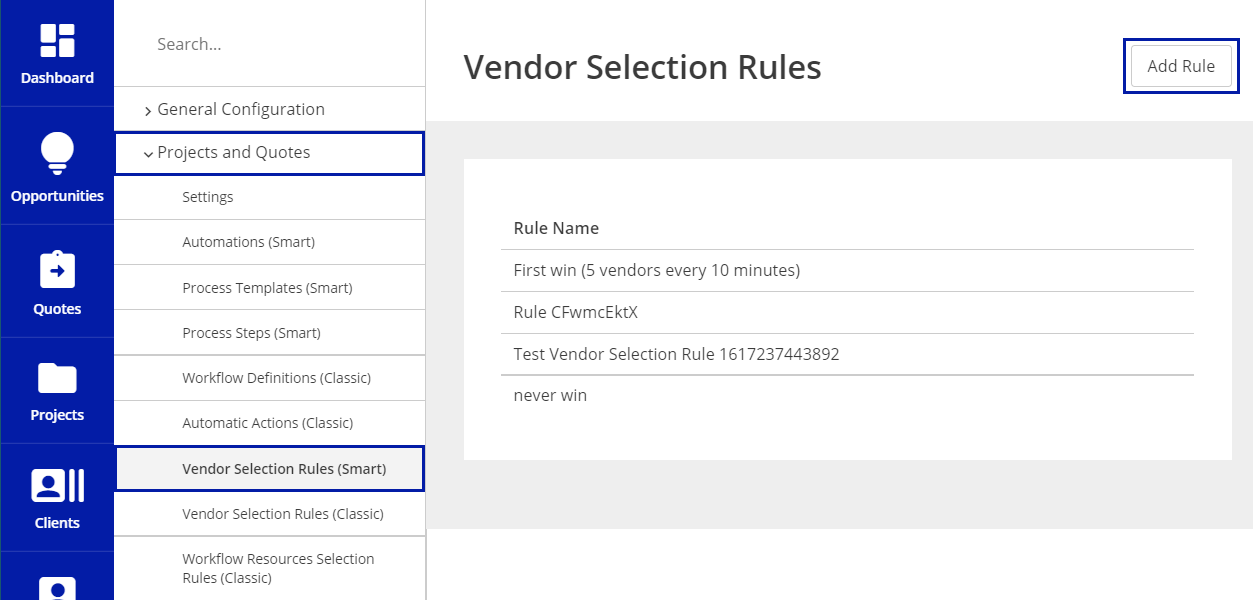
- Click Add Rule button in the upper-right corner. Add Rule menu opens.
- In the Rule Name field, enter the name of your Rule. Once done, click Add Rule button.
After adding the new Rule, its configuration menu appears. It consists of several panels, in which you can set up the properties. The panels are described below. All your changes will be saved automatically.
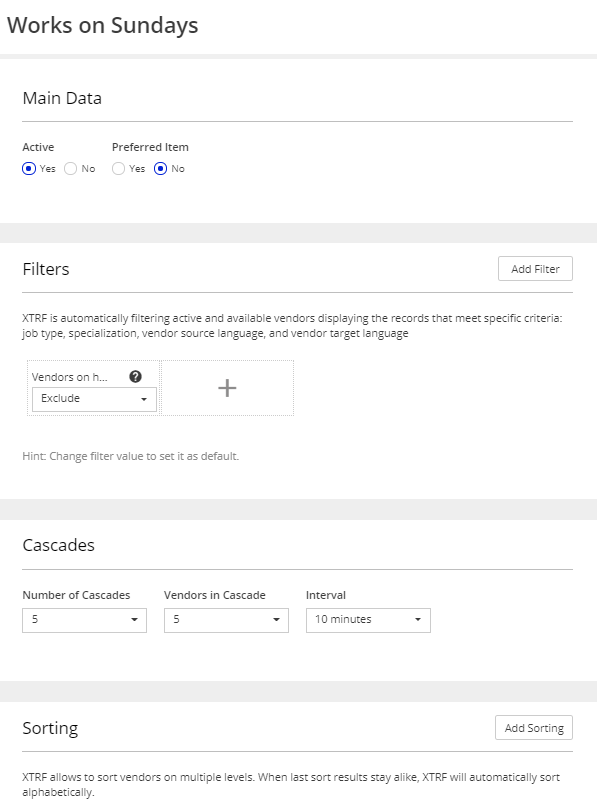
Main Data panel
In this panel, make sure your new Rule is Active. Otherwise, you won't be able to use it. You can also choose if you want your Rule to be a Preferred Item. Preferred Items are are displayed at the top of lists and drop-down menus. Make your choice by selecting Yes or No options, as needed.
Filters panel
In this panel, either click Add Filter button or the rectangle area with a "+" symbol to add a filter, according to which Vendors will be selected to Cascades. You can select one or more of the following filters from the list:
- CAT Tool - to select Vendors using specific CAT tools;
- Category - to select Vendors with specific Categories assigned;
- specific Custom Field - to select Vendors with specific Custom Fields values only;
- In-house - to select either in-house or external vendors;
- Individual - to select either freelancers or companies;
- Preferred - to select preferred vendors only;
- Vendors on vacations - to include or exclude vendors that are on holidays when Job Offer is sent.
Note that in Vendor Selection Rules, XTRF automatically filters active Vendors to match the required Job Type, Specialization, source language, and target language. XTRF also automatically verifies Job's planned start date and planned deadline against vendor's planned holidays. If vendor's vacation coincides entirely with the Job's schedule, that vendor will be excluded from the list of recipients of the Job Offer.
Cascades panel
In this panel, decide on a maximum number of Cascades for the Rule, a number of Vendors asked in a single Cascade, and a time interval between the Cascades. Select the desired values using the drop-down lists.
Sorting panel
In this panel, choose how the Vendors should be sorted in Cascades You can select one of the following options from the drop-down list:
- Estimated Cost
- Overall Vendor Evaluation
- Specific Vendor Evaluation
Editing Vendor Selection Rules
To modify an existing Vendor Selection Rule, go to the Vendor Selection Rules menu and click the desired Rule. The Rule's configuration menu opens. You can rename the Rule, by clicking its name and entering a new one. Once done, click Accept icon.

Next, you can modify the Rule's set-up as described above. All your changes are saved automatically.
Note
You can't delete Rules, but you can make them inactive in the Main Data panel.
Use Case
Set up a Rule sending a Job Offer every 20 minutes to 3 freelance translators working in memoQ, until the Job Offer is accepted. Translators with higher quality ranking should be sent the Job Offer first.
- Add a new Rule. Give it a distinctive name. Make sure the Rule is active.
- In Filters panel, add CAT Tool and Individual filters, and set their values to "memoQ" and "Yes", respectively.
- In Cascades panel, set Vendors in Cascade to "3" and Interval to "20 minutes". Also, set up Number of Cascades to your liking.
- In Properties panel, set Sort by to "Overall Vendor Evaluation".
Customer support service by UserEcho
