How to add and use a Custom Field
This is an old version of the article. Please check the actual version in our new Knowledge Base.
XTRF Platform is fully customizable, and therefore it allows you to add non-standard fields.
XTRF Platform provides you with a number of fields that allow you to add as many pieces of information as you need to easily control the operations of your company. However, it sometimes happens that you might need some non-standard fields to add a particular piece of information.
You can add Custom Fields in a variety of types and various areas of the Home Portal. However, we recommend reading an article explaining the role of Custom Fields. You can find it HERE.
You can learn how to add a custom field to the selected area of the Home Portal by following the steps provided below.
Adding a new Custom Field
- When in the XTRF Home Portal, click on the
 Configuration Menu > General Configuration > Custom Fields and Columns.
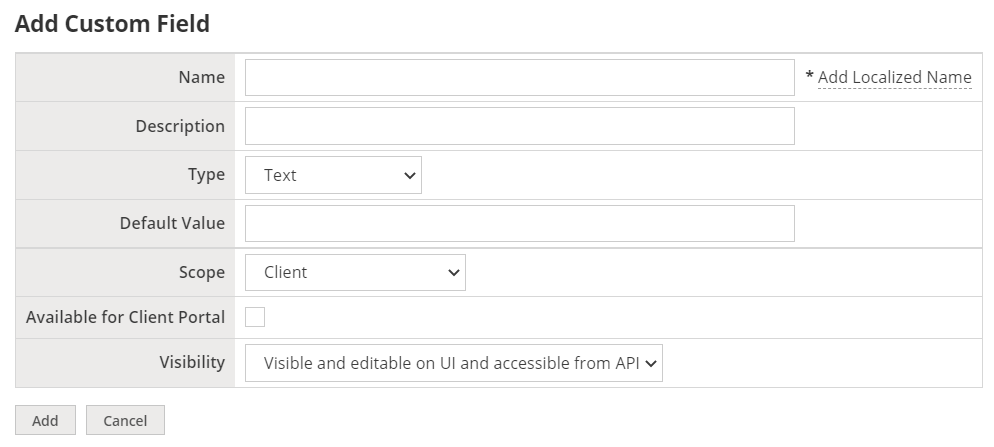
 - Click the Add Custom Field button in the upper right corner. You are directed to the Add Custom Field page.
- In the Name field provide the name for the new custom field.
- (Optional) Provide a short description of the purpose of the custom field.
- From the Type drop-down menu select the type of the custom field. Note, that the limit is 10 custom fields of one type within a scope.
- In the Default Value section select what will be selected by default in the custom field.
- From the Scope drop-down menu select the area of the Home Portal in which the custom field is to appear.
- Check the box if you wish to display this Custom Field in the Client Portal as well.
- From the Preferences drop-down menu select whether the custom field should be:
- - Visible and accessible both on user interface and from API (default)
- Visible on user interface but accessible only from API,
- Visible and accessible only from API. - Click the Add button to save the settings of the custom field and add it to the system.

Set up the Order of the Custom Fields
If you have prepared multiple custom fields, you might need to prepare an order in which the custom fields are displayed. To change the order of custom fields, follow the steps below:
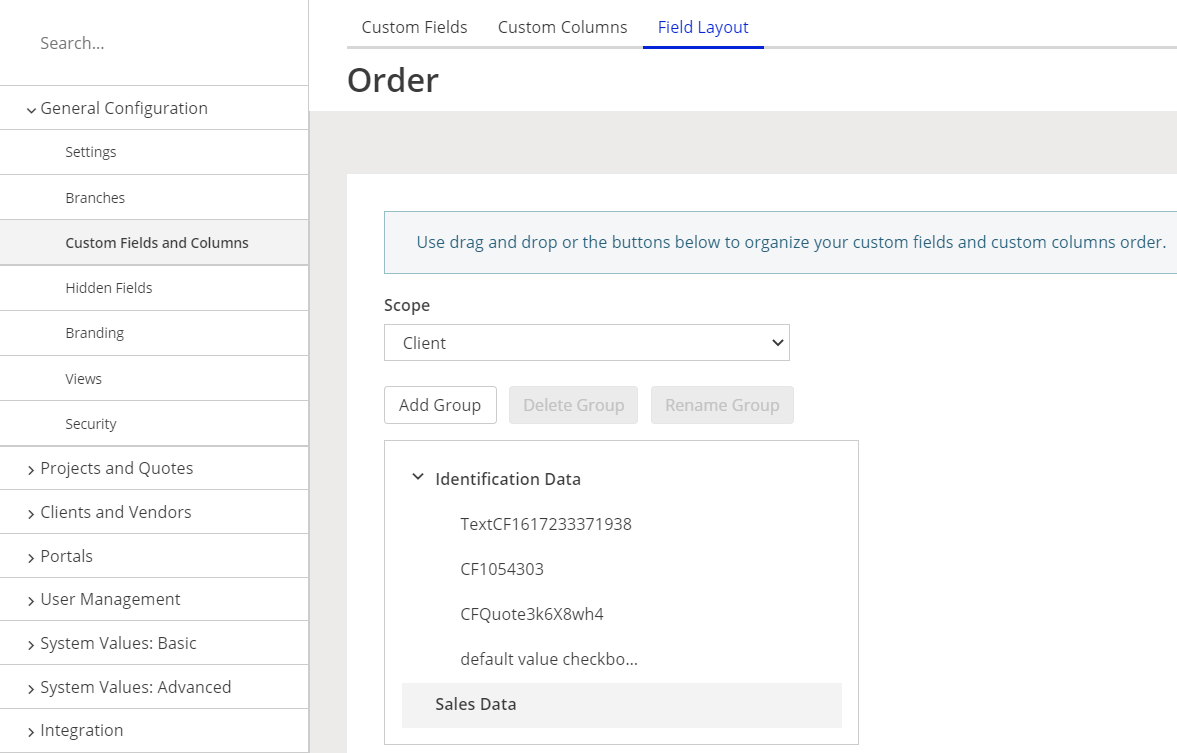
- In the configuration accordion menu click on Custom Fields and Columns.
- Click the Field Layout tab.

- From the Scope drop-down menu select the Home Portal's area in which you wish to manage the order of custom fields.
- (Optional) In Client and Vendor sections you can add groups to categorize your Custom Fields. To add a group:
- Select the Identification Data or other default tab.
- Click the Add Group button. A new group appears under the tab.
- Add a name for the new group.
- You can now move your custom fields to the new group. To move the Custom Fields to the group simply click and hold them and then drag and drop in the proper group.
- In the Custom Fields list click the proper Custom Field, drag it and drop in the location of your choosing. You can drop the Custom Field in different groups, if there are any, and change it's place in relation to other Custom Fields.
Use of the Custom Field
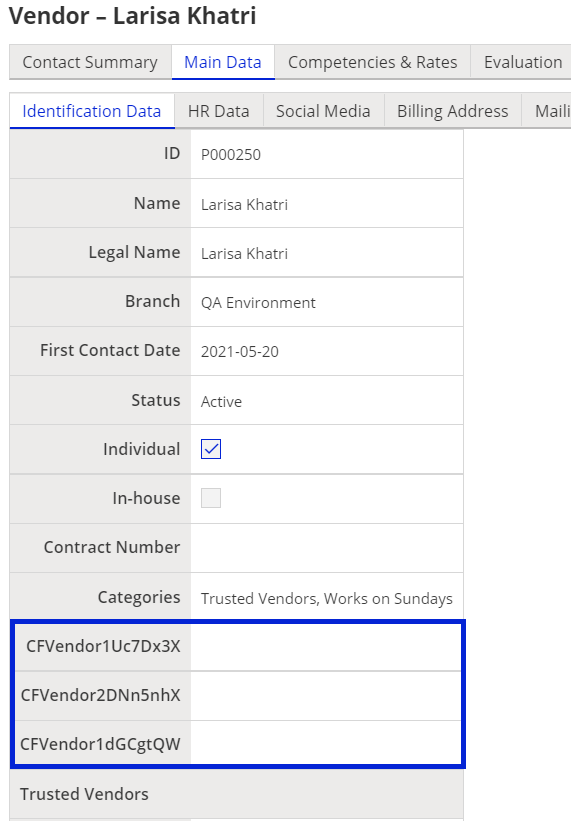
Now, when you have prepared some custom fields and configured their order, you might want to know how to find them in the interface. The following steps describe how to find a custom field added to the vendor's main data tab. To do so, perform the steps:
- Go to the Vendors view.
- Select a vendor.
- Click the Main Data tab.
- You can find your custom fields in the Identification Data sub-tab. The custom fields are at the bottom of the table. The custom fields are displayed in the order prepared in the configuration.

- Click the Edit button to provide information in the custom fields.
- Click the Save button to save all the changes.
Customer support service by UserEcho

