Vendor Portal: Creating an invoice upon specification
This is an old version of the article. Please check the most up-to-date version in our new Knowledge Base.
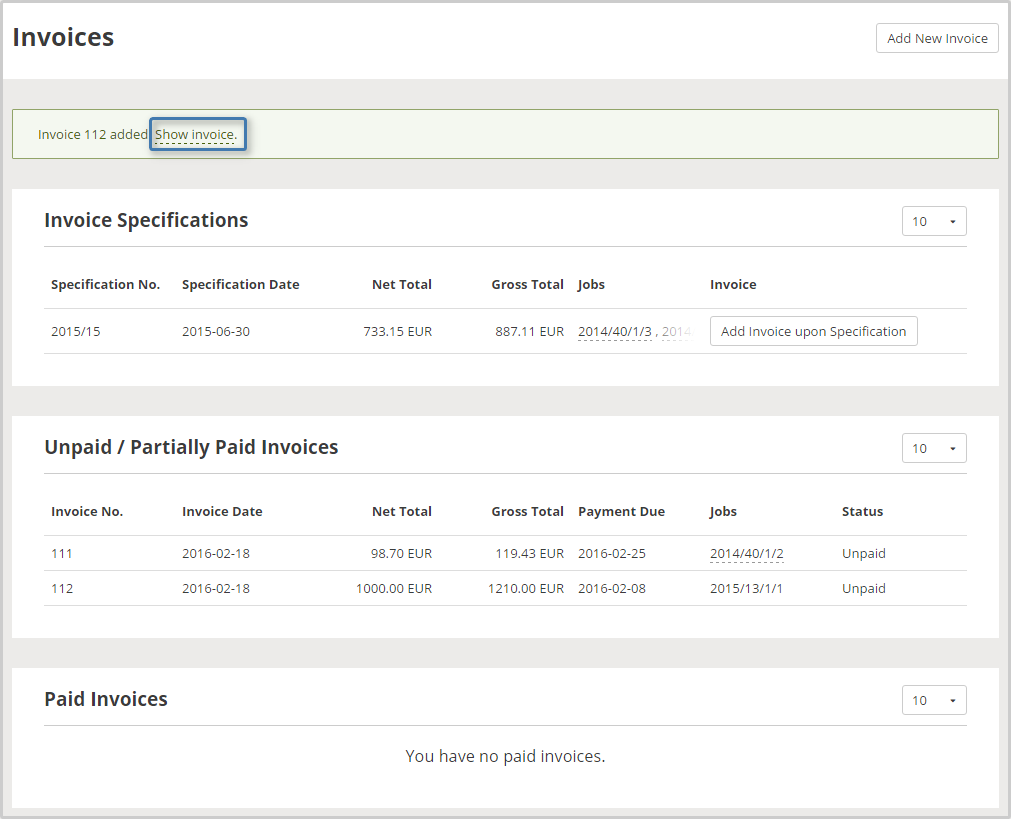
This guide describes how Vendors can create invoices based on specifications that were produced for them in the Home Portal.
Before reading this guide
- The steps without any marking are mandatory to perform because they ensure carrying on a proper function of the Home Portal.
- The steps marked with the (Optional) label give you information about settings useful for you in terms of fulfilling specific requirements for your projects, but if you skip them it will have no negative effect on the function of the Home Portal.
How to add an invoice
The Jobs qualified for being invoiced could be collected on one invoice form in two ways:
- Manually by PM, or
- Automatically by a Periodic Job.
Vendor can add a new invoice for provided Jobs or upload an invoice upon specified list of Jobs as indicated by Project Manager. Only the Jobs in status 'Ready' are good to be invoiced.
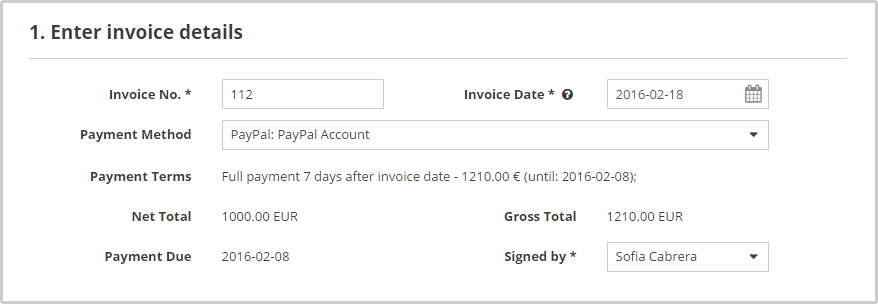
The following data needs to be stated:
Invoice number
Invoice date
Payment method
Invoice file can be uploaded as well.
How to create an invoice upon specification
Follow the below steps:
- Sign in to the Vendor Portal.
- Go to the 'Invoices' module.
- Select the invoice from the Invoice Specifications card and click the "Create invoice upon specification" button. You are redirected to the New invoice upon specification display (you will find the same button in the Completed Jobs card, in the Jobs module, when the specification for the job has been provided.)
- The information about the specification is copied to the future invoice Contact Person responsible for this invoice.
- In the 'Invoice No.' field provide the number your invoice carries.
- In the 'Invoice Date' provide the date of the invoice in the appropriate format. You can also click on the calendar icon and select the date from the calendar.
- From the 'Payment Method' drop-down menu to select how the payment should be delivered.
- In the 'Signed by' field provide the contact person responsible for the invoice.
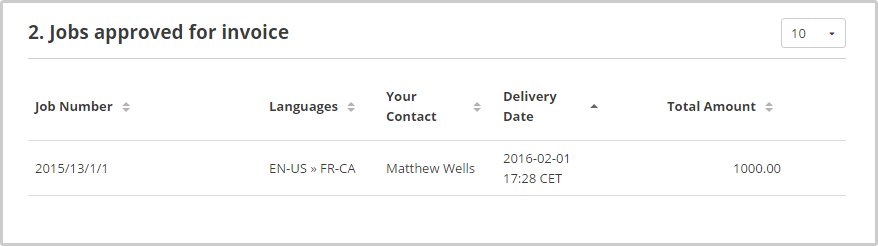
- In the second card you can see the details of Jobs approved for invoice.
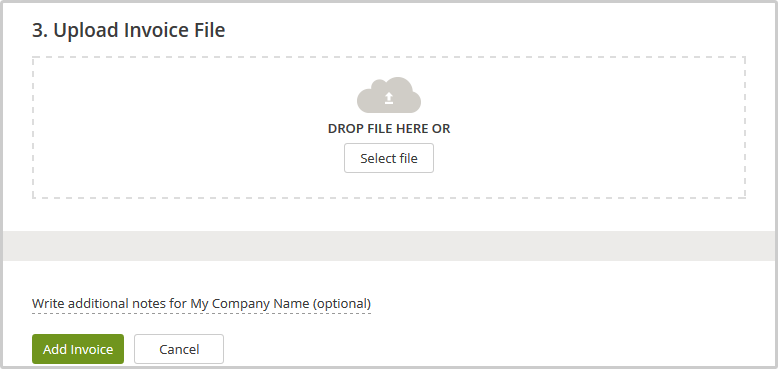
- In the 'Upload Invoice File' card you can upload the invoice file in accordance to the translations agency's guidelines.
- Uploading An Invoice File
- It is mandatory to upload the invoice file when you did not get an invoice from the translation agency.
- Any file format is permitted.
- Uploading An Invoice File
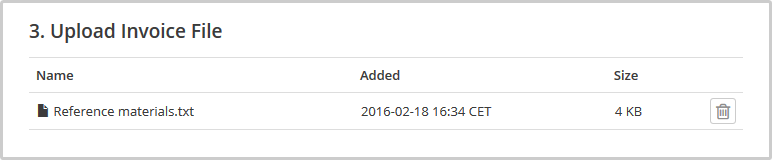
- When you upload a file, a new panel appears with your file details. You can use the trash icon to delete this file at any time.
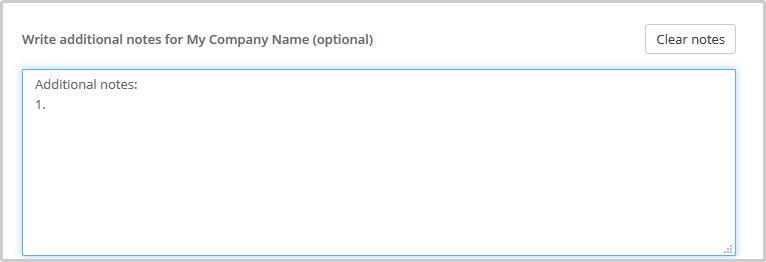
- (Optional) You can write additional notes to the translation company. Click the Write additional notes for "My Company Name (optional)" link. The field for additional notes appears.
- Click the Add Invoice button. You are redirected to the invoices module.
- Click the Show invoice link to view a newly created invoice.
- Download Your Invoice
- In the invoice display its possible to download the invoice file and view the details.
- In the invoice display its possible to download the invoice file and view the details.
- Download Your Invoice
Customer support service by UserEcho
