XTRF2XTRF integration
This is an old version of the article. Please check the actual version in our new Knowledge Base.
XTRF2XTRF integration
- Overview
- How to get access to the XTRF2XTRF integration?
- How does the XTRF2XTRF integration work?
- How to use the XTRF2XTRF integration?
Overview
XTRF2XTRF is an integration that connects two different XTRF Home Portals. This service is created for language service providers whose subcontractors (vendors) are also working on the XTRF Platform. Using XTR2XTRF helps to avoid unnecessary steps of reentering the project details and easies the process of ordering complex jobs from vendors.
Note: This integration is possible only if both parties are working with Smart projects.
How to get access to the XTRF2XTRF integration?
The most important prerequisite for this integration is that your vendor already has their own XTRF instance. Also, before requesting this service, please contact your subcontractor and make sure that both parties of the integration agree on the details and are ready to start.
To start using the XTRF2XTRF service, open a ticket with our Help Desk or contact your Customer Success Manager. Please mention in the ticket that you want the service installed and provide the name of the subcontractor’s company. When the registration is processed, you and your subcontractor will receive a message with the instructions for activating the integration.
After you receive the message:
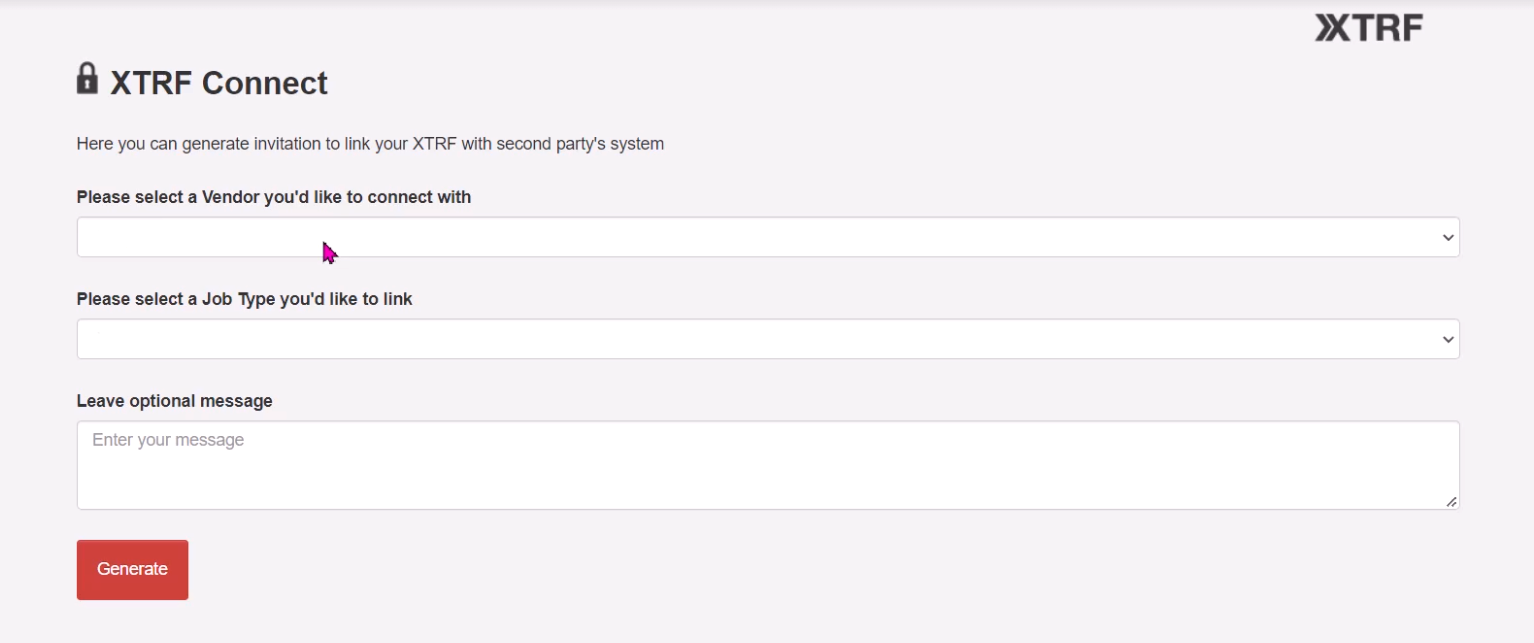
- Follow the link from the message and provide the received secret identification key.

- Select the vendor that represents the subcontractor’s company.
- Select the job type that will be synchronized with the subcontractor’s instance.
- Click the Generate button.
- Copy the registration link and send it to the subcontractor so they can complete the registration on their side.
The subcontractor has to:
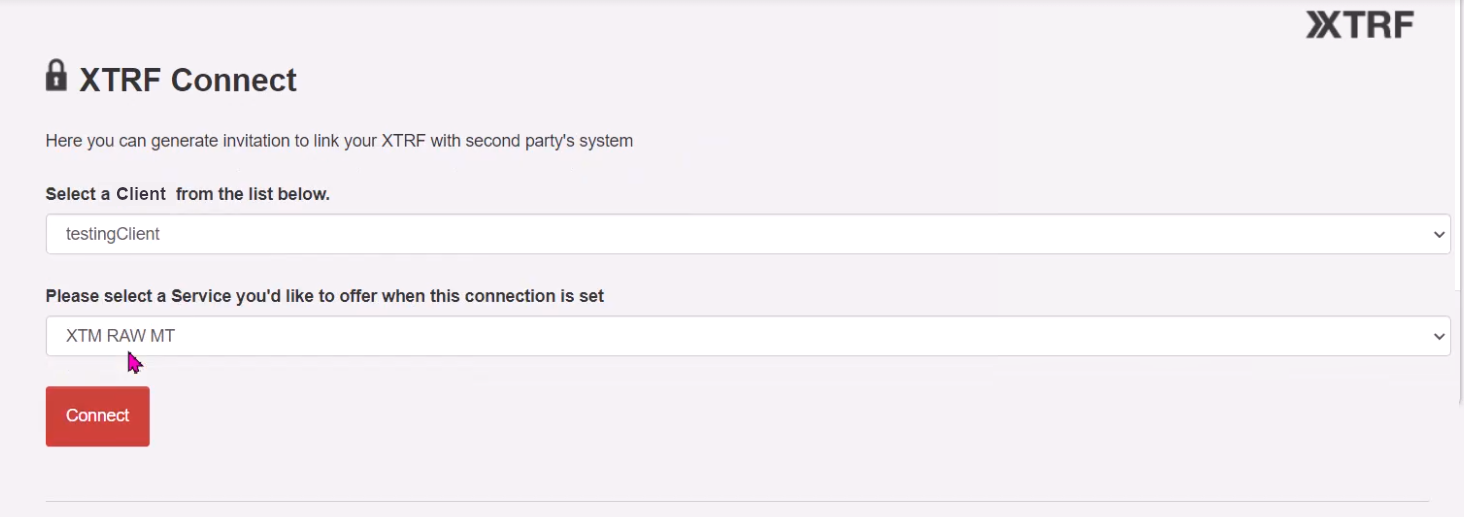
- Follow the link and provide their secret key.

- Select the client to whose instance they are connecting.
- Select the service they will provide for the client through this integration.
- Click the Connect button.
How does the XTRF2XTRF integration work?
The integration synchronizes the following data between the client and the subcontractor:
- project ID (the ID of the client’s project becomes the name of the subcontractor’s project)
- dates (job dates from the client become Ordered On and Client Deadline for the subcontractor’s project)
- files (source files from the client to the subcontractor, ready files from the subcontractor to the client)
- languages (if present in both systems)
- CAT tool links.
When you select your subcontractor as a vendor, a new project is created automatically on the subcontractor’s XTRF instance. This project will contain the source files from your original project.
Even if the service you request from the vendor consists of several steps, you don’t need to create a complex process on your side. The subcontractor will do this on their own XTRF instance.
After the vendor finishes the job, you get the ready files back in your project.
How to use the XTRF2XTRF integration?
Client
- On your XTRF instance, create a new smart project. Make sure that this project contains the job you selected during the integration setup.
- Provide the necessary details about the project and add source files.
- Go to the Process card and locate the job that will be synchronized.
- Select the vendor you’ve set as a subcontractor during the integration setup.
- The job status is automatically set to Accepted.
- Click the StartTranslation Job(s) button.
Now the vendor has to complete the synchronized project on their side.
After the subcontractor has finalized the requested job, the ready files appear automatically in your project, and the job’s status is set to Ready. The PM of the project receives a standard e-mail about the finished job or files ready for delivery in case this job is the last one in the process.
Subcontractor
When your client starts a job that is to be synchronized with your XTRF instance, a new project for this client appears in your Home Portal. The service provided in this project will be the one you selected during the integration setup; however, you may change it if needed. The project will contain all the details and the source files provided by the client.
- Proceed with the project as usual.
- After you complete all jobs and set their status to Ready, the files will be automatically delivered to your client.
Note: the synchronization creates a unique Client Reference Number. Any changes in this number will disrupt the synchronization, so make sure to not edit this field in the project’s Order card.
Customer support service by UserEcho

