How to issue a Credit Note in XTRF
This is an old version of the article. Please check the actual version in our new Knowledge Base.
Do you need to correct an invoicing mistake? Did someone ask you for a refund? Maybe you want to introduce pre-sales or execute a post-sale discount? Issue a Credit Note in XTRF to do so.
PrerequisiteTo take advantage of this solution, upgrade XTRF to version 9.2 or newer. If you're using an older version of the system, other articles describe temporary solutions for ISSUING and OFFSETTING credit notes. |
A credit note is a document that suppliers provide to customers to notify about a credit applied to their account. XTRF allows to issue Credit Notes for Client Invoices that have already been sent but require corrections.
To issue a Credit Note, follow the steps below.
Step 1: Select an invoice
Credit Notes have two access points:
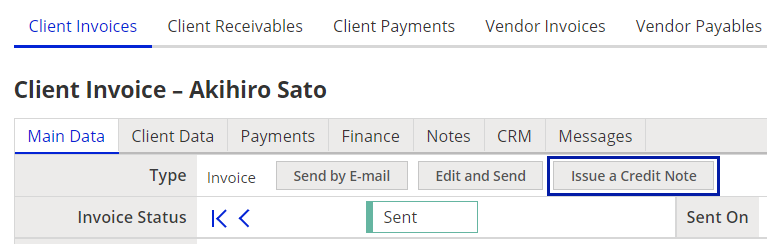
- Open an existing invoice, and in the Main Data tab click on Issue a Credit Note.
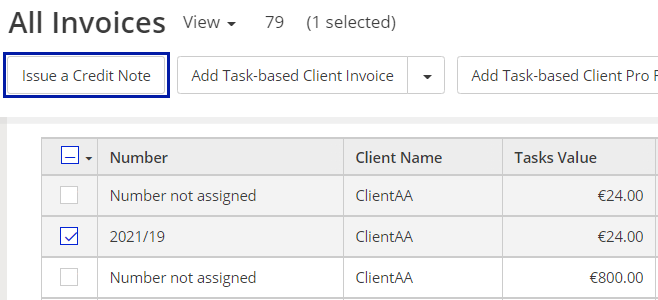
- In the ‘Invoicing’ module select one of the Client Invoices from the browsing list. A menu above appears, and you can click on Issue a Credit Note from there.
Note
When you click on Issue a Credit Note, the original invoice gets partially locked out from editing and you can’t change its status until the Credit Note is either sent or deleted.
There is a limit of one Credit Note per invoice. So to create a new Credit Note, the selected invoice cannot have a Credit Note already assigned to it. You also cannot issue a Credit Note for another Credit Note.
Step 2: Specify an intent
Clicking on Issue a Credit Note opens a creator wizard. Specify your intent for the Credit Note, to get the document predefined and easier to edit.
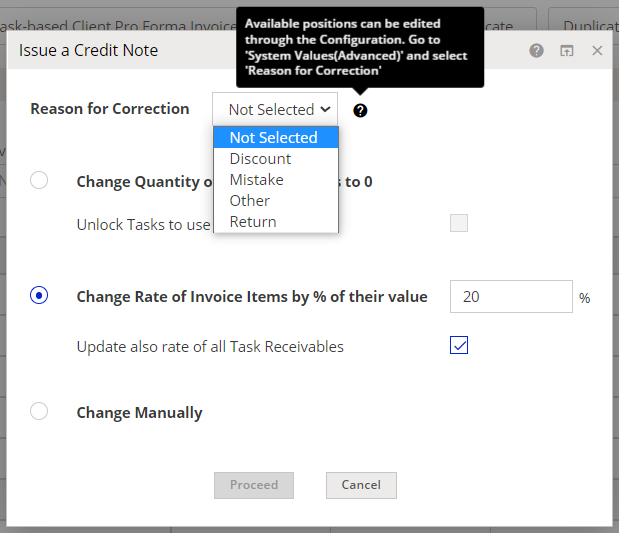
Select a ‘Reason for correction’ from the drop-down menu. The list of available options can be configured in Configuration Menu > System Values: Advanced > Reasons for Correction.
Full refund
Select ‘Change quantity of Items to 0’ to prepare the Credit Note for a 100% refund and cancel the purchase of Invoice Items.
You can additionally select ‘Unlock Tasks to use on a new Invoice’ to allow Task Receivables from the original Client Invoice to be added to a different invoice. However, you can’t then edit them inside a Credit Note.
Partial refund
Select ‘Change rate of Invoice Items by % of their value’, then type in the discount / refund percentage. The discount will be applied to these particular invoice items, but not to Task Receivables. If you wish to apply the percentage drop to Task Receivables as well, and use the new rate going forward, select ‘Change rate of all Task Receivables’ as well.
Custom changes
Selecting ‘Change Manually’ creates a credit note with no pre-defined data and leaves everything available for editing. Helpful when none of the above options is enough to fulfill the range of required changes. You will be able to adjust the invoice items, as well as the value of Task Receivables used in the original invoice. To learn more, read the article “How to manually edit a Credit Note in XTRF”.
When you’re done, click on Proceed to open the document.
Step 3: Edit the Credit Note
Credit Note editor looks a lot like a regular invoice editor, but with several fields specific to the nature of a credit note as a document.
Let’s go through some of the basic options that differ in the Credit Note editor.
- Payment Terms: now changed to ‘Reason for Correction’
- Tasks Value: now divided into three sections: Value before correction, Value of correction and Value after correction.
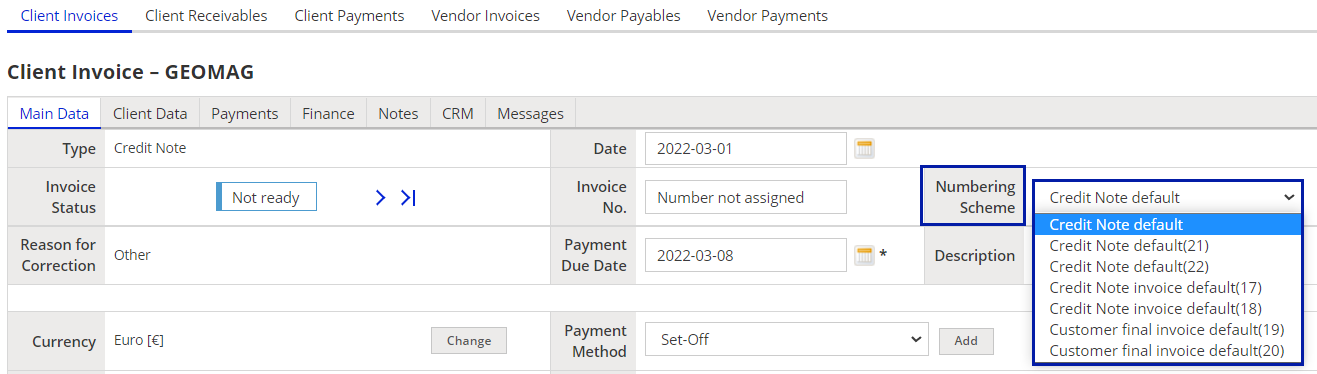
- Invoice number: the numbering scheme for Credit Notes can be configured in
Configuration Menu > Templates > Numbering Schemes. Either Add a new numbering scheme or Edit an existing one. Then click on the Type drop-down menu and select Credit Note numbering scheme. Fill out the desired formula and click Save.

Later, when you’re editing a Credit Note with the status ‘Not Ready’, click on the Numbering Scheme drop-down menu and select one from the list of available Credit Note numbering schemes.
- Payment Due Date:
- if the issue date of the Credit Note precedes the Payment Due Date of the original invoice, Payment Due Date is copied from the original invoice.
- if the issue date of the Credit Note follows the Payment Due Date of the original invoice, Payment Due Date is set for 14 days ahead of present date.
- Net Total / Gross Total: now divided into three sections: ‘Original’, ‘Change’ and ‘New’.
- Original invoice: Accessible by clicking on its number.
- Invoice recipient: if provided, contact details will be shown on the Credit Note document. If not, this field will not be displayed.
- Removing Tasks: click Edit > Remove. The task is removed from the Credit Note and the original invoice as well, but still present in the views with
strikethroughacross the name and values. - Values display: corrected values are
struck through, new values are bolded.
Default Credit Note template
XTRF provides a built-in Credit Note document template. Go to Configuration Menu > Templates > Document Templates and select ‘Built-in Credit Note’ in the language of your choice. You can also create your own Credit Note templates based on our built-in template. Depending on what interface you’re proficient at, you can modify a BIRT-4 template, or a HTML-based template with a visual editor.
Deleting an entire Credit Note
Deleting Credit Notes is enabled in status ‘Not Ready’ - before they get an assigned number. This works exactly as in original invoices.
Changed Invoice Items are gone, and cannot be recovered.
Changed Tasks and Receivables are detached from the deleted Credit Note, and will appear in a new Credit Note, if it’s created for the same original invoice.
Read also:
Customer support service by UserEcho
