Vendor Workload view
This is an old version of the article. Please check the actual version in our new Product overview documentation.
Vendor Workload view is available in 'Vendors' and Vendors 'Price Profiles' views. You will see it when choosing a Vendor for a job or choosing Vendors for Job Offers (in Smart Projects).
By default, the system displays Vendors in the standard table mode. To switch to Vendor Workload mode, simply click the button within any view where this option is available:

These settings, as well as cogwheel options, are saved for each individual user.
View settings
Three time span options are available: 1 Day, 3 Days and 1 Week. You can switch between them either using the + and - symbols, or choose one from the drop-down list. You can also change from the 3 Days / 1 Week scale to a specific day simply by clicking on its date. The 'Today' button will display a view of the current day. You can also switch Vendor Workload to a full-screen view by clicking the Square Icon in the top right corner.

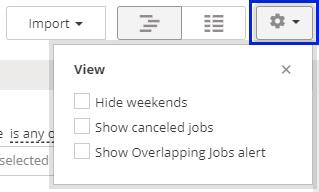
When you click on the Cogwheel Icon in the top right corner, you will see the following settings:
a) for the 3 Days and 1 Week settings, you will see three options: 'Hide weekends', 'Show cancelled jobs' and 'Show Overlapping Jobs alert'
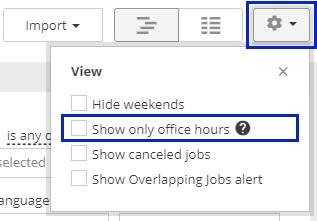
b) for '1 Day' view you will additionally see the option 'Show only office hours'
When you switch to Vendor Workload mode for the first time, you will see a 1 Week range, and none of the above options will be selected.
Office hours are specified in ![]() Configuration > Clients and Vendors > Vendors Settings > Availability tab.
Configuration > Clients and Vendors > Vendors Settings > Availability tab.
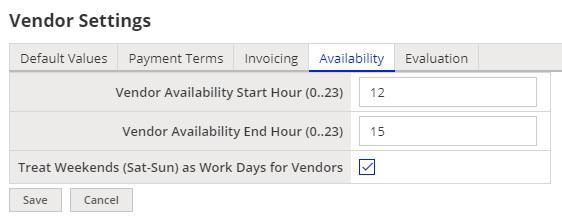
If your Vendor Workload is set to show weekends, then you will get two different results depending on how you have configured the 'Treat Weekends as Work Days' setting:
a) if this option is selected, Jobs will be placed on weekends too and these days will be taken into account for workload calculations
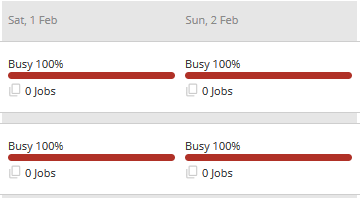
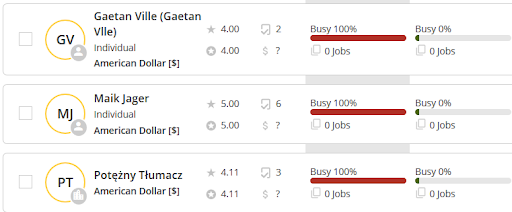
b) if this option is not selected, weekends will be displayed as Busy 100%
Vendor Workload for Classic and Smart Projects
When it comes to Smart Project Jobs, Vendor Workload mode shows additional details. For example, you can change Job dates in the Job card, or simply drag & drop the bars between dates - in this case, the smallest increment you can change by is 20 minutes. On the Select Vendor popup, you can only move a job for which you are selecting a Vendor.
In Vendor Workload mode you can also see alerts available for Smart Jobs. The below shows how the “Overlapping Jobs” alert is displayed.
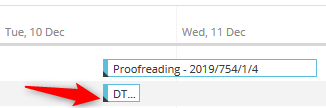
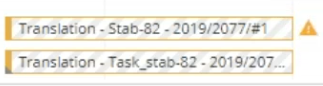
Classic Jobs in Vendor Workload mode can be distinguished by a triangle icon in the bottom left corner of the Job bar:
Overview
This is what the Vendor Workload mode looks like when opened in the Vendors view:
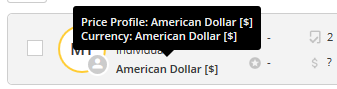
In Vendors Price Profiles view it will also display vendors’ Price Profile name:
Hovering your mouse over a Price Profile will display its currency:
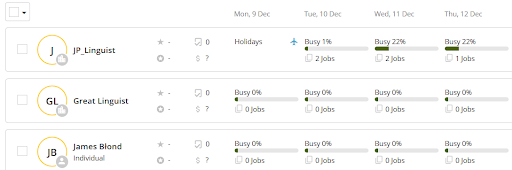
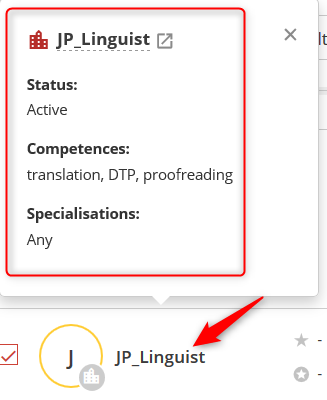
The icons displayed next to a Vendor name represent their Overall Evaluation, Specific Evaluation, Completed Jobs and Rates. There are new icons indicating if a Vendor is an individual (person icon) or a company (building icon), and if a Vendor is in-house (blue background of the icon) or not (grey background of the icon). Clicking on a Vendor’s name will show a Vendor card with general Vendor information and a direct link to the Vendor’s profile:
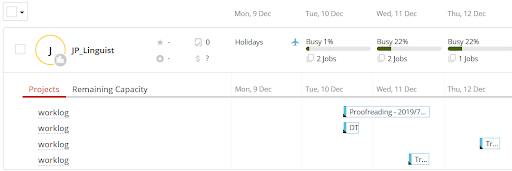
In the center part of the view the overall Vendor busyness is displayed, divided into days. If a given Vendor has Holidays listed in their profile, a blue plane icon will be displayed for those days.
Using the following arrow buttons you can expand or collapse the Jobs area:

In the Jobs area, there are two tabs: Projects and Remaining Capacity. The Projects tab displays a given Vendor’s Job details. The Job bars are displayed in colors corresponding to their status. On the left-hand side there is also a direct link to the Project or Quote linked with a given Job
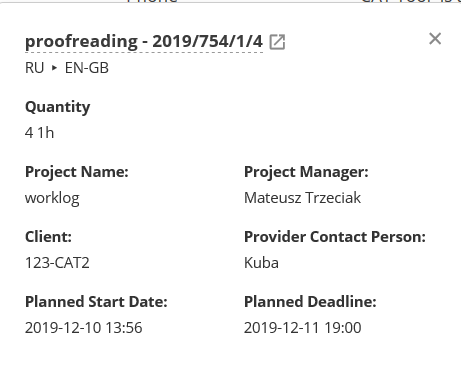
After clicking the Job bar, a card with the Job details appears. On the top of the card there is also a direct link to the Job:
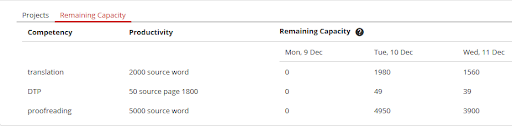
The Remaining Capacity tab displays a given Vendor’s workload details in a table. The Competency column displays the Job Types defined in the Vendor’s profile. Next to it, there is a Productivity column showing the number of calculation units that a Vendor can process per day for a given Job Type. Productivity can either be specified globally for all Vendors in a given Job Type’s properties, or individually for each Vendor in their profile. The Remaining Capacity section displays a calculated value of how many calculation units a given Vendor can still take on a given day, depending on their Productivity per Job Type
When selecting a Vendor for a Job with defined dates using Vendor Workload mode, you will see a yellow box representing the single Job and the whole period in days framed in yellow. This also works when selecting Vendors for several jobs.
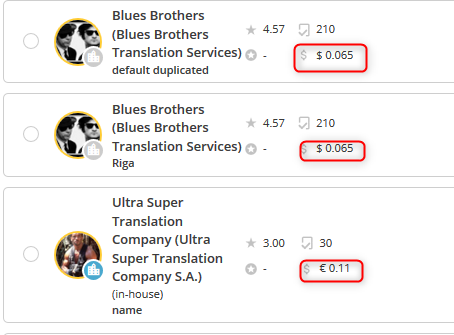
If the Job Type, Calculation Unit, Language Combination and Specialization of a job match those of the Vendor profile, the Vendor Workload mode will display Vendor rate and specific evaluation (if defined) next to their profile picture:
Conditions to properly display all details in Vendor Workload mode
In order to be displayed in Vendor Workload mode, a Job needs to have a Start Date, Deadline and Vendor assigned. To calculate overall Vendor busyness for each day, all Jobs need to have Payables defined. All Payables need to have a Quantity and correct Calculation Unit entered. If the Calculation Unit differs from the Base System Calculation Unit, it needs to have an Exchange Ratio defined in its properties.
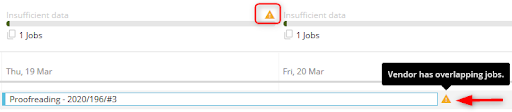
Additionally, a Job Type needs to have specified its Productivity in the Vendor's profile or Job Type configuration, with the correct Calculation Unit as well. If one of these conditions is not met, the workload view will display an Insufficient Data error message instead of the expected workload value - it will be displayed on all days applicable to a given Job. When you hover your mouse over this message, you will see a tooltip explaining the possible reasons for this error:

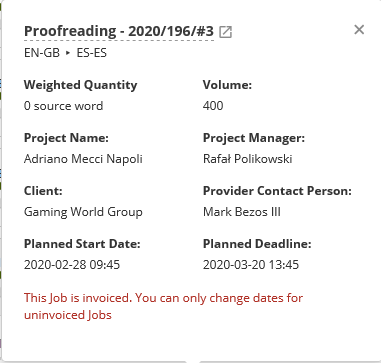
If a job is already invoiced, you won’t be able to change its details. This information will be shown on the Job card:
If a Job has been started after the planned deadline, the system assumes that the deadline for this Job is at the end of the next day. Such a Job is marked with diagonal stripes. Additionally, if a Job is from a Smart Project, there will be an alert displayed next to it. Such indication is kept until the Project Manager changes the Job’s Planned Deadline to a date which is later than the Started date. Until this happens, the Job's Payables will not be taken into account in workload calculations
If the start and finish dates are defined for a Job, it will be displayed according to those dates.
Limiting user rights in XTRF (Users Management -> Users groups and rights) will also influence how things are displayed in Vendor Workload mode. For example, if a user does not have rights to display the Vendor Price Profile, limited information will show on the vendor icon, for instance remaining capacity will not show, and the Vendor Workload mode will not be available in the Vendor Price Profiles view.
Workload Calculations
This is how calculations are computed to display overall business data in %:
1) To calculate availability we first need to assess the time needed for a Vendor to do all of the accepted work (based on Quantity in Payables), using the unit of days. Number of days formula:

2) Availability by Productivity (*excluding weekends if non-working and excluding holidays):

Job duration is calculated in days - both an eight hour job and a one hour job are counted as one day.
Customer support service by UserEcho
