Vendor Portal settings for Managers
This is an old version of the article. Please check the actual version in our new Knowledge Base.
Configure your Vendor recruitment, invoicing and management options in the Vendor Portal settings.
How to access Vendor Portal settings in the Home Portal
Click on the ![]() Configuration Menu > Portals > Vendor Portal.
Configuration Menu > Portals > Vendor Portal.
The Home Portal offers a variety of configuration options to streamline the Vendor recruitment process and to formalize your company’s relationship with them.
After applying changes, click on Save at the bottom of the screen to confirm.
Portal Settings
How to set up your company name in the Vendor Portal
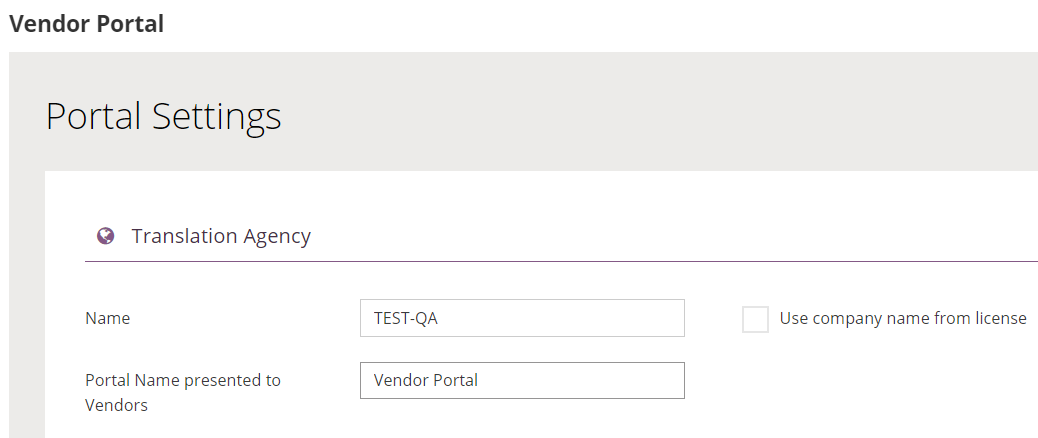
To use the same name as in the XTRF licence, just check the box. Otherwise state your own company Name. You can state a different name for the eyes of Vendors, if you wish them to associate with a certain company identity.
How to set up recruiter contact details for Vendors

Open the drop-down menu to select the Head Recruiter from all active users of the Home Portal. The Head Recruiter is formally the main contact person for Vendors. Checking the boxes will automatically fill out the fields with Head Recruiter’s email and phone number, unless you wish to use other contact data, like a general mailbox or an open phone line, to which more people within the company will have access.
Recruitment Settings
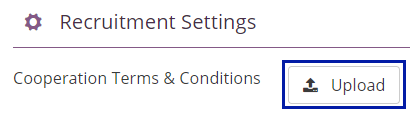
How to add Terms and Conditions to the Vendor Portal
Scroll to ‘Recruitment settings’ and click Upload to add the document with Cooperation Terms and Conditions. It will be linked to the Vendor Portal and viewable to Vendors upon registration.
How to select services available for Vendors in the Vendor Portal
Services in the Vendor Portal (known as ‘Job Types’ in the Home Portal) are the type of work searched for among Vendors. With the list selected here Vendors can fill out their profiles with services they are proficient in: define their competencies to help recruiters with their search.
Scroll to ‘Recruitment settings’ and click on a free space inside the box to open a drop-down list.
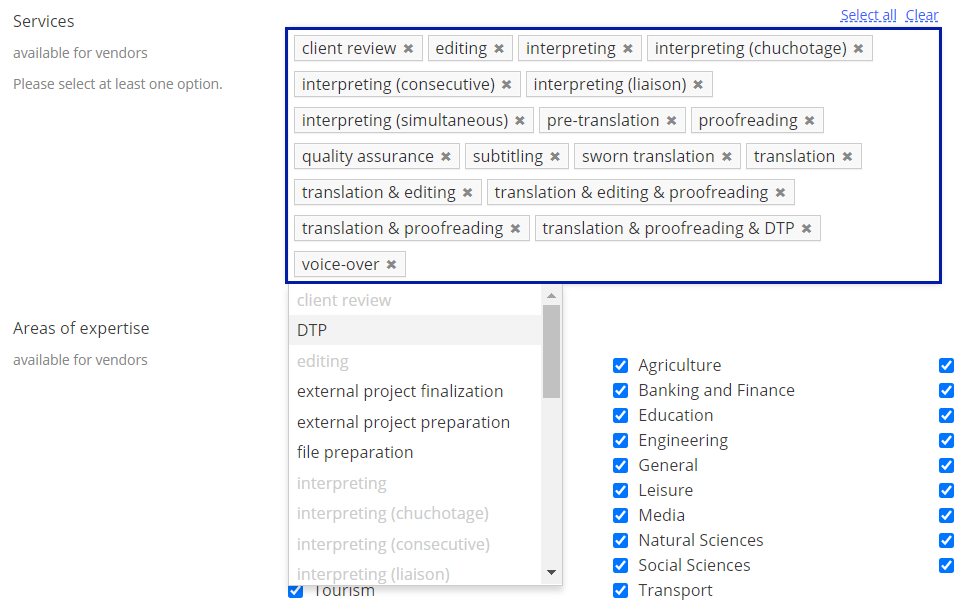
Several services are included by default. Click on the positions in the drop-down menu to add them to the list. Clicking on texts above the window allows you to Clear the list or Select all available services.
The list of services selectable on this page can be configured in ![]() General Configuration > System Values: Advanced > Job Types.
General Configuration > System Values: Advanced > Job Types.
How to select the areas of expertise available for Vendors
Areas of expertise (known as ‘Specializations’ in the Home Portal) are the criteria meant to help the recruiter narrow down the search for suitable candidates for an area-specific Job. Later Vendors may fill out their profile with areas of expertise they specialize in.
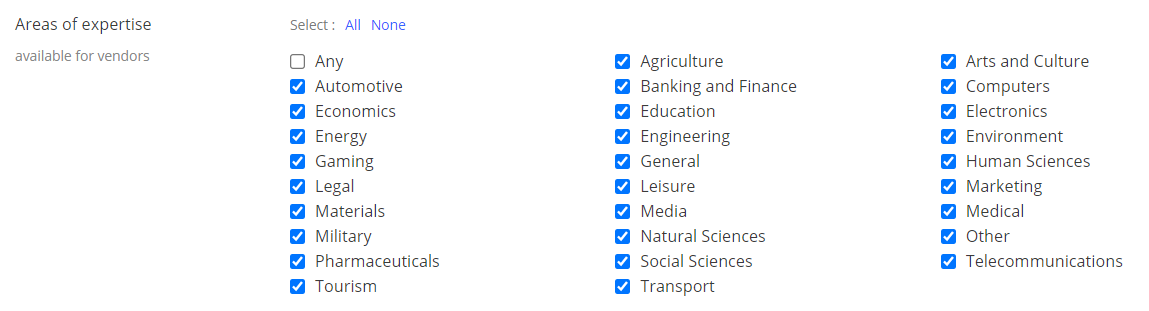
Scroll to ‘Recruitment settings’ and check the boxes next to areas of expertise you wish to have available for creating Job Offers, as well as for Vendors to detail their profile with. All areas of expertise are enabled by default. Clicking on texts above the window allows you to select All areas or None.
The list of areas of expertise selectable on this page can be configured in ![]() General Configuration > System Values: Advanced > Specializations.
General Configuration > System Values: Advanced > Specializations.
How to define rates for the Vendor Portal?
To outline the boundaries in which Vendors will be allowed to set their rates for Jobs, scroll down to ‘Recruitment settings’.
Check the box if you want to allow Vendors to specify a minimum charge.

Click on the below box to select at least one default currency that will be displayed to the Vendor. If you select more, the Vendor will be allowed to choose one from the list.
The list of default currencies on this page can be configured in ![]() General Configuration > System Values: Advanced > Currencies.
General Configuration > System Values: Advanced > Currencies.

To assign a specific currency available for Vendors from a particular country, click on Add New. Then choose the country and the default currency from the drop-down lists. To delete the selection click on ‘X’.

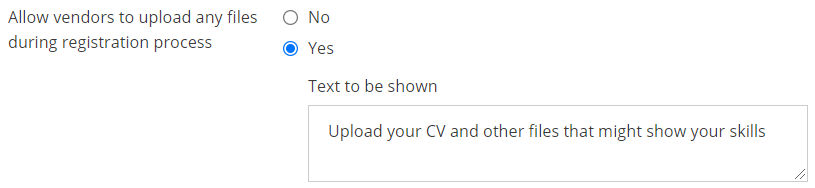
How to allow Vendors to upload CVs and other files to their profile?
You may want to vet Vendors and their competencies before adding them to your database. Scroll down to ‘Recruitment settings’ and next to ‘Allow vendors to upload any files during the registration process’ click on Yes. Then type in the message that the Vendor will see when registering, or leave it as default.
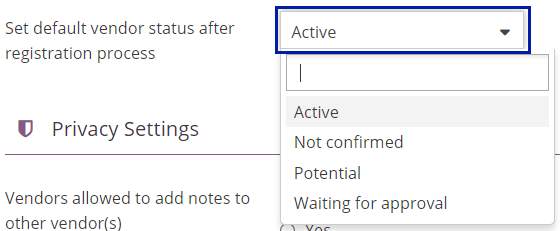
How to set the default status for new Vendors?
Depending on the vetting process you decide to take, right after Vendors complete their registration you may tag them in different ways. For example, if you have an open recruitment policy, set their status as ‘Active’ immediately, or if you plan to examine them further, choose other statuses, depending on how complex a recruitment you’re planning to stage.
Scroll down to ‘Recruitment settings’, click on the box next to ‘Set default vendor status after registration process’ and select the default status.
Privacy Settings
How to allow Vendors to communicate with each other?
In Smart Projects, outside of ‘All Project Members’ Chat Room in XTRF Chat there is also a way for Vendors to add notes to those who are assigned to Jobs later in the process. Notes usually include things to watch out for or keep an eye on: job specific details.
You may allow or block this by scrolling down to ‘Privacy Settings’ and clicking Yes or No next to ‘Vendors allowed to add notes to other vendor(s)’.

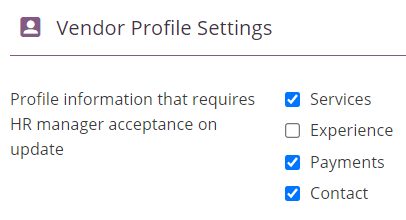
How to monitor changes in Vendors’ profiles?
To avoid confusion, contact problems or financial disputes when Vendors update their profiles (often mid-project), you may want to regulate the level of hands-on control.
Scroll down to ‘Privacy settings’ and next to ‘Profile information that requires HR manager acceptance on update’ check the boxes with information you wish to confirm changes to.
Job Manager Settings
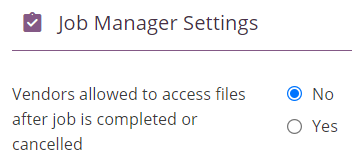
How to control Vendors’ access to files after Job completion?
Select whether you want Vendors to keep their access to files after their Job is ‘Ready’ or ‘Cancelled’. You may want to cut the access off depending on the Client’s policies or law requirements in their country.
Vendors’ access to files in completed Jobs is enabled by default. Changing the setting affects both received files and delivered files in all present, past and future Projects.
Reopening a Job restores Vendor’s access to files.
To change the setting scroll down to ‘Job Manager Settings’, and in ‘Vendors allowed to access files after job is completed or cancelled’ select Yes or No.
How to specify which Vendors are allowed to declare time spent on Jobs?
See THIS ARTICLE for details.
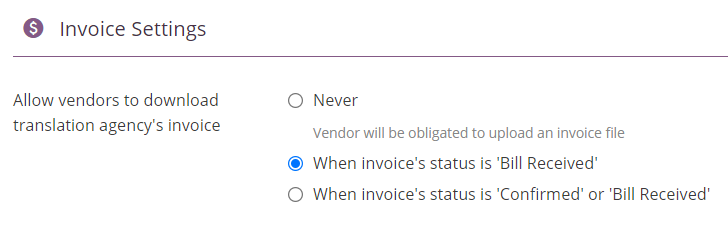
Invoice Settings
How to control the Vendors’ access to your invoices?
Depending on your company’s policies, you may prefer to lay the burden of specifying the criteria for invoicing on either Vendors or yourself. In the latter case, you control the moment in which Vendors are allowed to download the invoices they created based on your specification.
Scroll down to the ‘Invoice Settings’ and select one of the options from the radio buttons.
‘Never’ means you opted to rely on Vendors creating invoices based on their own criteria.
Two latter options mean you opted for Vendors to create invoices based on your own specification. In particular, the specification can be made available for Vendors depending on the Vendor Invoice status: ‘Bill Received’ or ‘Confirmed’.
Customer support service by UserEcho
