Admin workspace panel
This is an old version of the article. Please check the actual version in our new Knowledge Base.
Admin workspace panel
The XTRF Chat workspaces can be managed in the Admin workspace panel by users with the admin role. Here they can:
- manage members
- check the status of the available apps
- enable test mode.
To start using the admin workspace panel, an admin user has to be created. To do so, please, contact the XTRF Helpdesk and provide the e-mail address of an existing workspace member that will be granted the admin role. The selected user will receive an e-mail invitation to join the workspace as an admin.
Note: The Admin workspace panel is available only in the standalone web version of the XTRF Chat
How to use the Admin workspace panel
- Login to the standalone web version of the XTRF chat and switch to the Admin workspace in the left-hand panel (option visible for admin user only).
- In the right-hand panel, click the Open workspace admin panel button
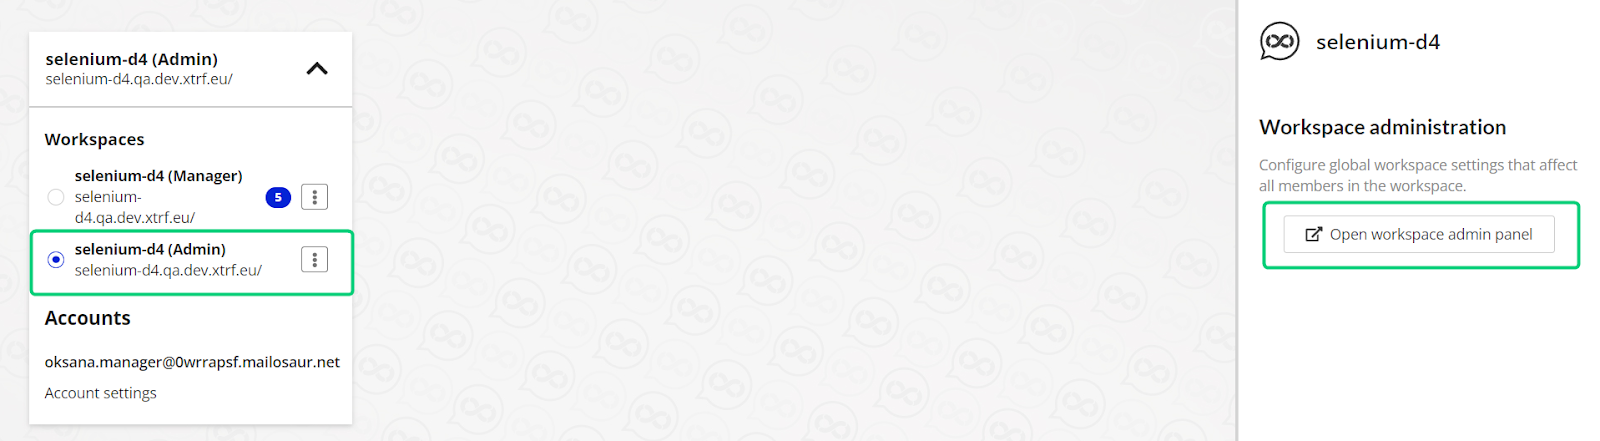
You will be directed to the admin space. Use the left-hand navigation sidebar to switch between cards.
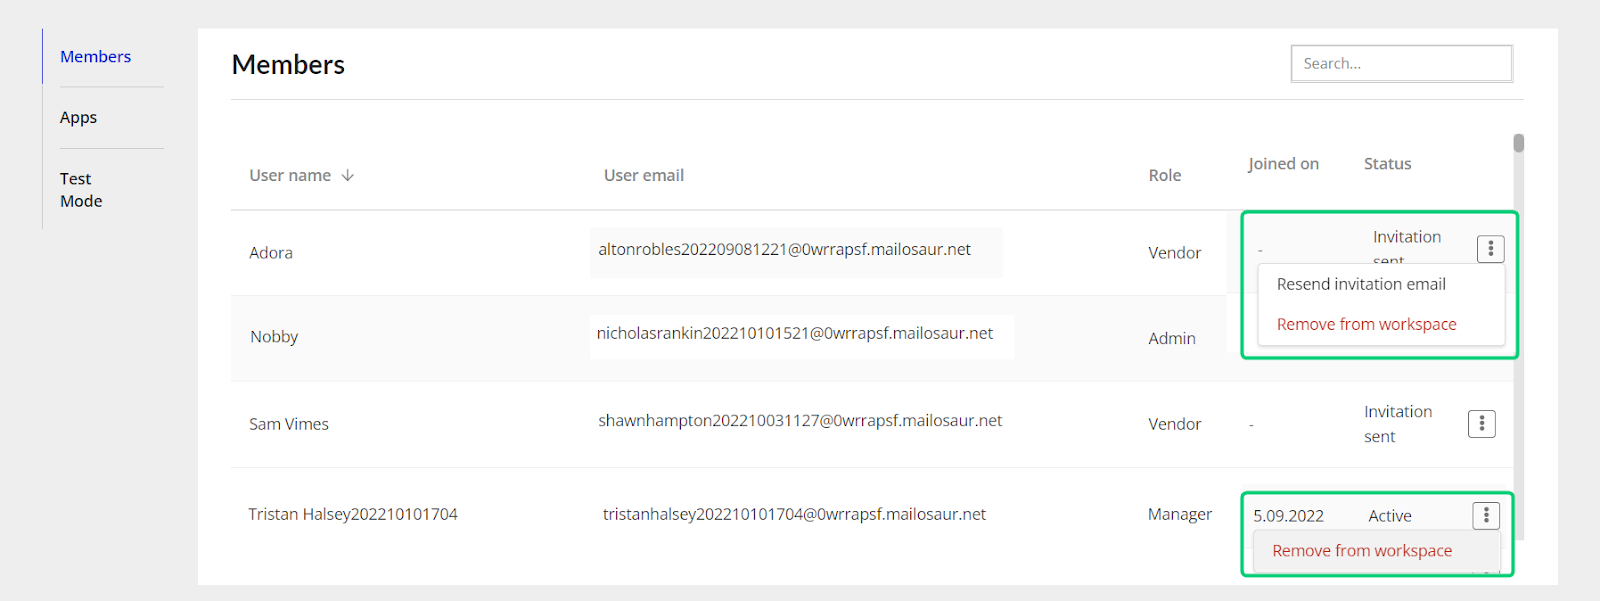
Members card
In this card, you can:
- browse all the members of the workspace
- remove members from the workspace
- resend the invitations to those who haven’t accepted them yet.
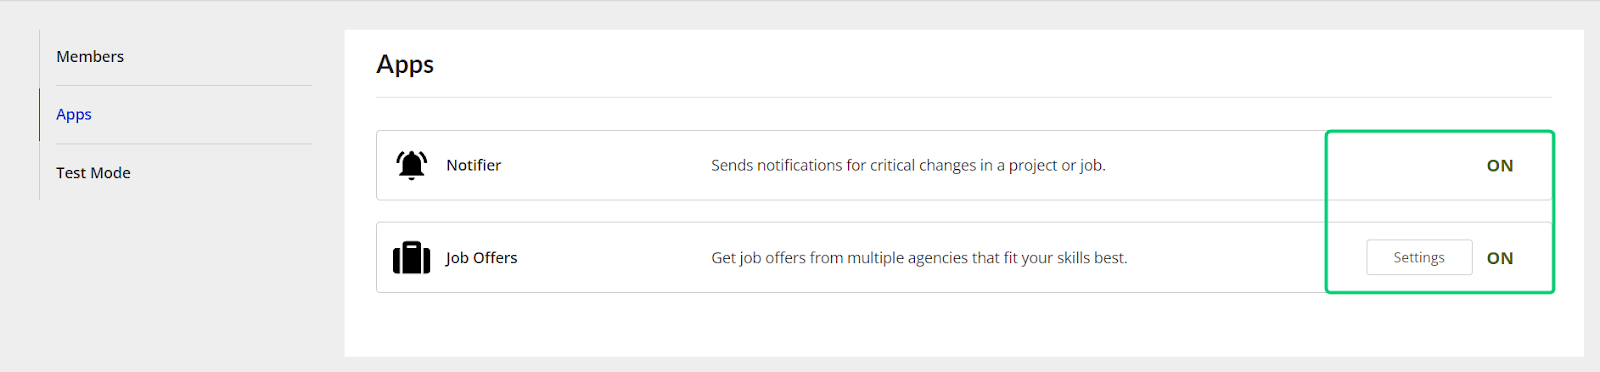
Apps card
In this card, you can check the status of the applications available for your workspace and take a shortcut to the app settings.
Test Mode card
In this card, you can limit access to your workspace by providing a list of trusted e-mail addresses or domains. Only users whose emails are listed here or belong to the listed domains will be allowed to use the workspace.
This option might be useful while testing your workspace before you invite external users.
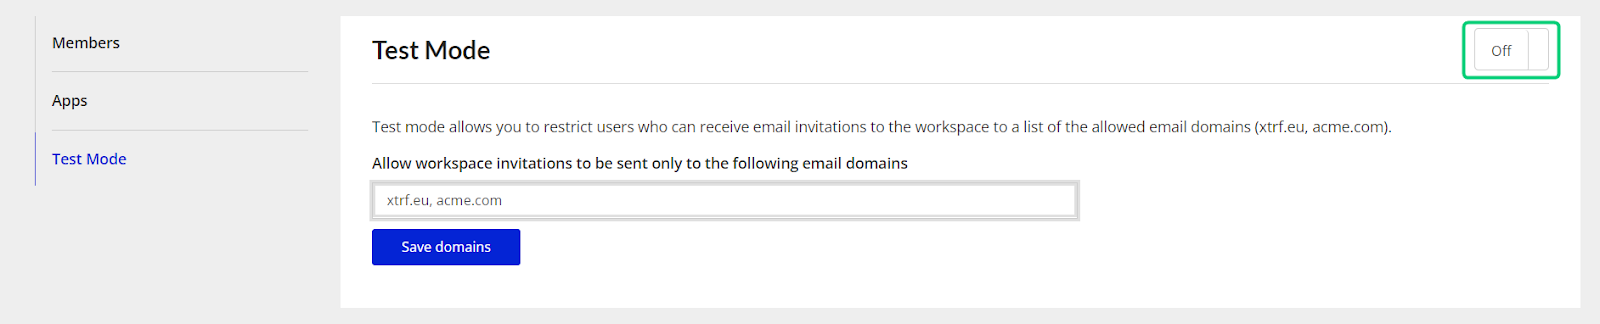
To enter the test mode:
- Provide trusted domains or single e-mail addresses in the text field and click the Save domains button.
- Separate the domains and e-mails with a comma, e.g., acme.com, john.doe@acme.com.
- To use e-mail subadressing, put the plus sign into square brackets, e.g., john.doe[+]1991@gmail.com.
- For multiple e-mail aliases, use the following expression (.*), e.g., john.doe[+](.*)@gmail.com.
- To remove a domain or an e-mail, delete its name from the field and click the Save domains button.
- Switch the toggle in the top right-hand corner to ON.
Note: You can also add and remove trusted domains while the Test mode is on.
Once the Test mode is enabled, all the users of the workspace see the corresponding notification.

To stop using the test mode, switch the toggle in the top right-hand corner to OFF.
Customer support service by UserEcho
