How to customize branding in XTRF
This is an old version of the article. Please check the actual version in our new Knowledge Base.
Add your company logo, favicon, custom background, and colors to the XTRF Home Portal, Vendor Portal, and Client Portal.
Contents
In this article you will learn how to brand XTRF with your:
- Logo
- Background
- Favicon
- Colors
Adding a custom logo is free.
White-labeling (removing XTRF branding) and customizing the look of XTRF portals is one of marketing features and is available for an additional fee.
You can also brand your emails. Learn about customizing email templates in this article.
How to customize a logo in XTRF
- Click on the
Configuration Icon > General Configuration > Branding > and the Logo tab on top of the screen.
- Hover over the ‘Custom logo’ placeholder image, and click on Select File.
- Upload your logo.
- If you’re ready to display your logo publicly, click on the ‘Custom logo’s’ radio button.
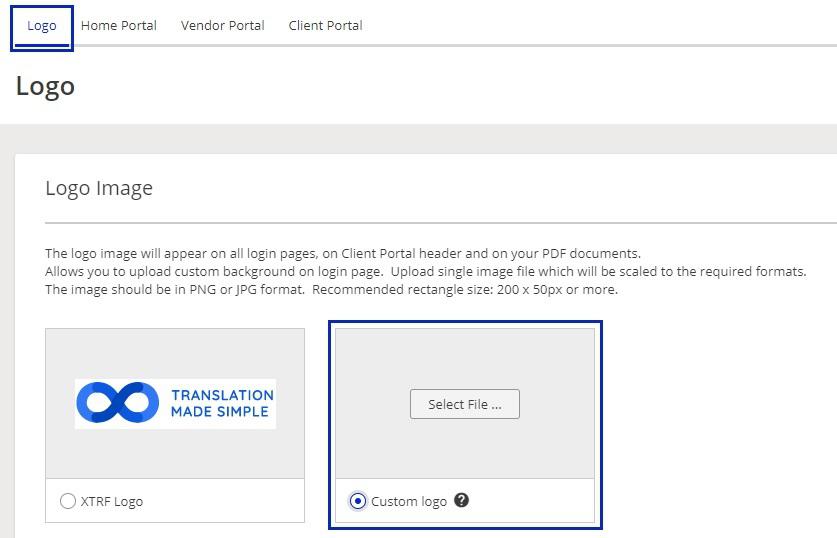
Logo image requirements
The recommended image size is 1920 x 1080 pixels in PNG or JPG format. The logo will be later resized to fit certain fields in the login screens and the top-left corner of the Portals (200 x 50 pixels).
How to customize a background in XTRF
- Click on the

- Scroll to the ‘Background’ card.
- Hover over the ‘Custom background’ placeholder image, and click on Select File.
- Upload your background.
- If you’re ready to display your background publicly, click on the ‘Custom background’s’ radio button
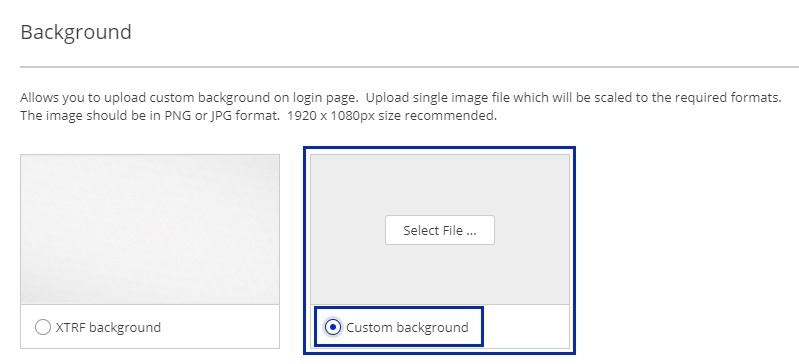
Background image requirements
The background field in XTRF has 16:9 dimensions. The recommended size is 1920 x 1080 pixels in PNG or JPG format.
How to customize a favicon in XTRF
- Click on the

- Scroll to the ‘Favicon’ card.
- Hover over the ‘Custom favicon’ placeholder image, and click on Select File.
- Upload your favicon.
- If you’re ready to display your favicon publicly, click on the ‘Custom favicon’s’ radio button.
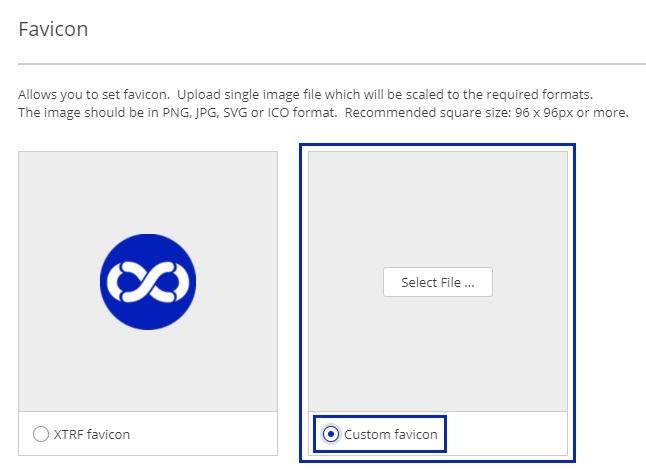
Favicon requirements
Favicon has 1:1 dimensions. The minimum size is 96 x 96 pixels in PNG, JPG, SVG, or ICO format.
How to customize colors in XTRF
1.Click on the Configuration Icon > General Configuration > Branding > and the Portal tab of your choice on top of the screen.

2. Scroll to the ‘Colors’ card.
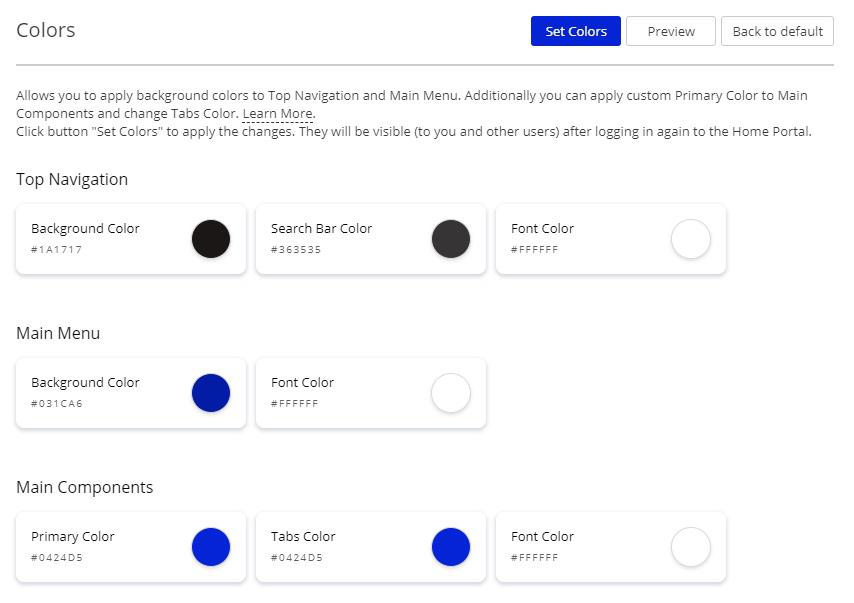
3. Click on the color buttons and select the colors from the palette, or paste the colors’ hex codes.
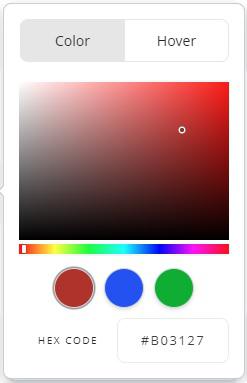
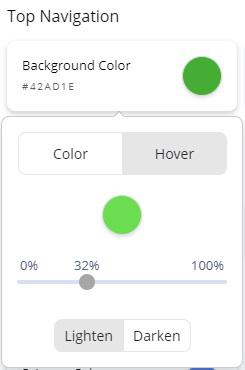
4. Where applicable, in the color selection popup, click on the Hover tab and select the color variations for the elements in the on-hover state.
5. Click on Preview to see how the Portal will look.
6. If you’re ready to display your colors publicly, click on Set Colors. Log out of the portal and log in again to see the changes.
7. If you wish to restore the default colors of the portal, click on Back to Default

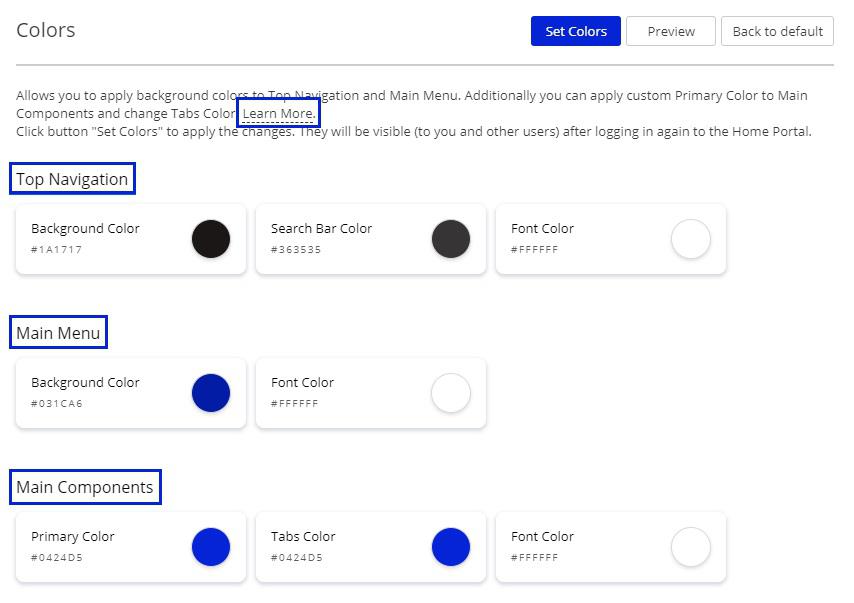
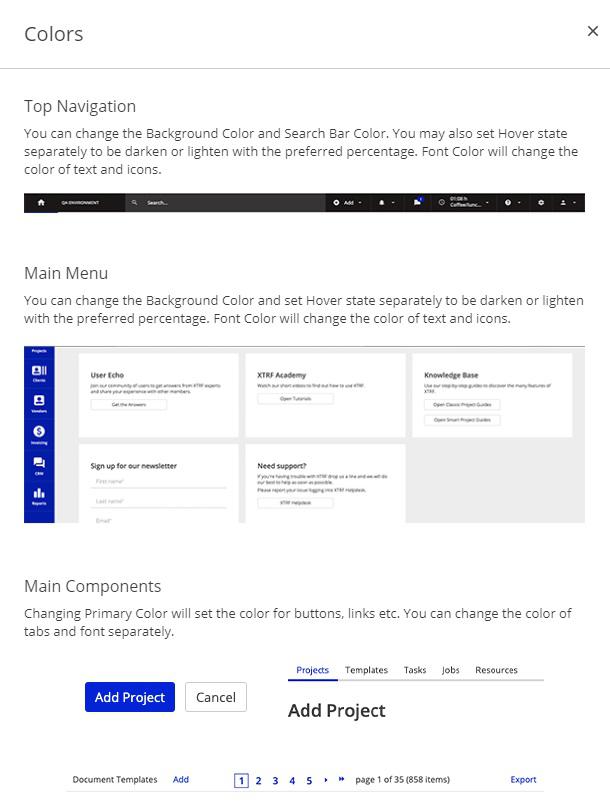
What colors can be changed?
You can change the colors of Top Navigation, Main Menu and Main Components (like buttons, checkboxes, calendar tiles, etc.).
See the example below.
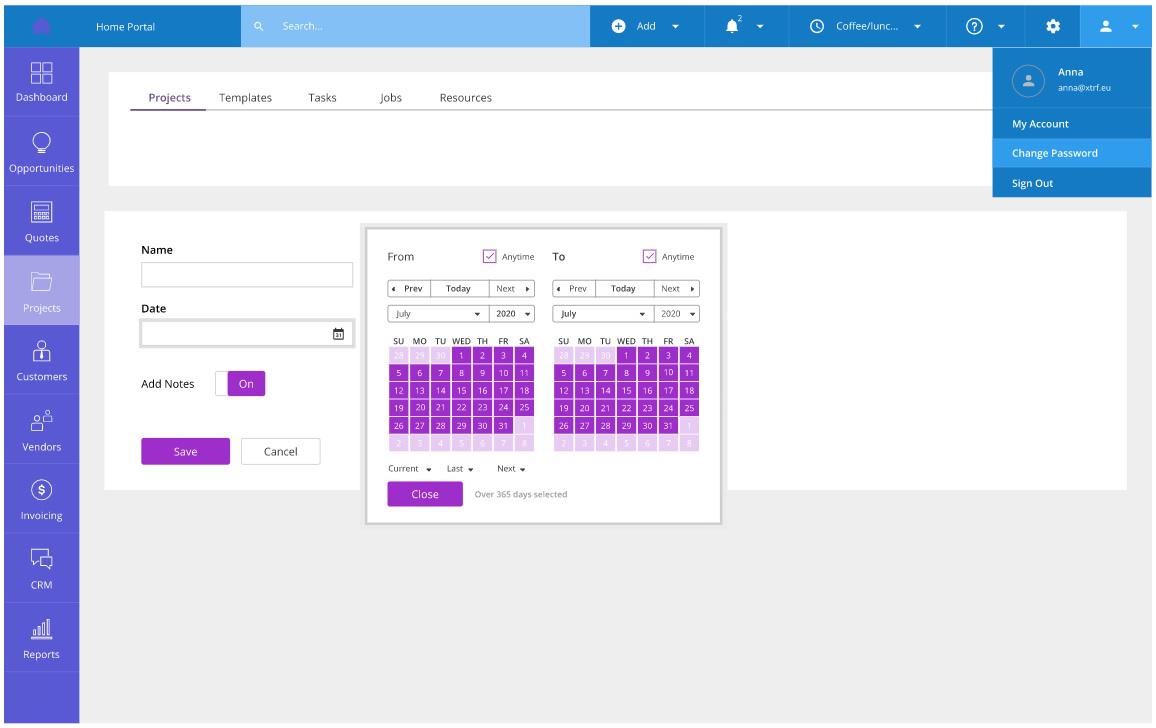
Example color preview of customizable elements with lighter hover variants:
Top Navigation (the blues)
Main Menu (the purples)
Main Components (the violets)
If you need more details on Top Navigation, Main Menu, and Main Components, click on Learn More.
Customer support service by UserEcho