Automatic Payables
Automatic Payables is a feature that automatically calculates fees for your Vendors on the basis of project volume and vendor's Price Profile.
With the automation switched on, one Payable will be automatically added for each language combination in each Job in a Project. Each time a Payable is added, the Project Manager is displayed a success flash message. The Payables get recalculated automatically, if you change the assignee. Depending on the configuration, they can get recalculated if newer analysis is provided. Project Managers can also edit the Payables created automatically at any time. If you remove a given Job, the respective Automatic Payable also gets removed.
Global Configuration
Automatic Payables can be configured globally for all new Smart Quotes and Smart Projects. To enable this feature globally:
- Go to
 Configuration menu.
 - Go to Projects and Quotes > Automations (Smart) (alternatively, start typing "Automations" in the menu's Search field).
- Scroll down to Automatic Payables card.
- Switch the automation On using the switch in the upper-right corner of the card.
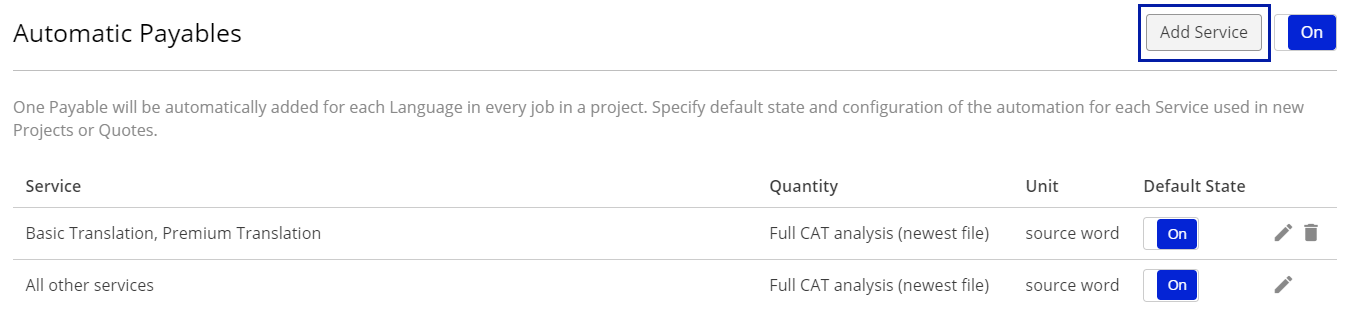
- (optional) Click Add Service button in the upper-right corner of the card if you would like to configure different behaviour of the automation depending on the Service offered. The 'Add Dervice' window appears.

Select at least one Service. Click Add Service button to save your selection. - From the list on the left-hand side of the card, select a case for which you want to configure the automation.*
- Switch the selected Service On using the switch on the right.
- Click on
 Edit Icon. Edit Automatic Payable window appears.
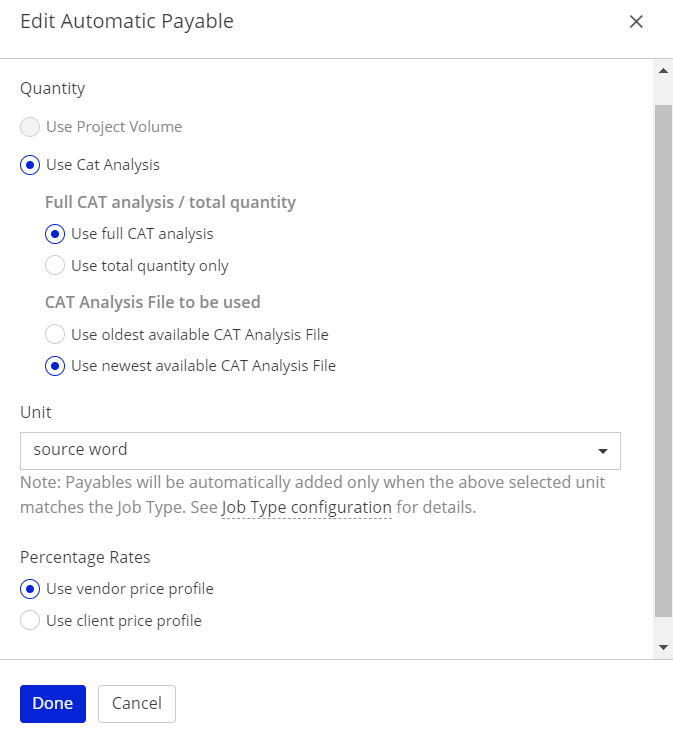
- Set up the Automation's configuration in the following areas:
- Quantity - decide on the quantity using the following options
- Use Project Volume - this feature will be available soon
- Use CAT Analysis - default quantity option for the time being; you can decide whether to use full CAT analysis or total quantity only and whether to use the oldest or the newest available CAT analysis file.
- Unit - select the calculation unit from the drop-down list. Note that Payables will be added automatically only when the selected unit matches the Job Type.
- Precentage Rates - decide if you want to use vendor or client Price Profile to adjust precentage rate values for repetitions, full and fuzzy matches.
- Quantity - decide on the quantity using the following options
- The settings you choose are saved automatically and will be valid for every new Smart Quote or Smart Project.
*All created Cases are listed on the left-hand side of the Automatic Payables card. Services not added to any Case are grouped under default 'All other services' Case. A Service can be added only to one Case, but a Case can group many Services. You can click a Case to view its settings.
To delete a Case, click on a ![]() Trash Icon. As a result, the services from the deleted Case will get moved to 'All other services' Case. Note that the 'All other services' Case cannot be deleted.
Trash Icon. As a result, the services from the deleted Case will get moved to 'All other services' Case. Note that the 'All other services' Case cannot be deleted.
Note
Remember that if you want to activate the automation globally, you need to switch it on, regardless of the Case-specific on/off settings.
Project-specific Configuration
Automatic Payables can also be configured individually per Smart Quote or Smart Project. Such configuration takes precedence over the global settings described above. This means you can set up a different behaviour of this automation for each Smart Project, regardless of the global configuration. You can also switch off this automation for particular projects, despite it is switched on globally (and vice-versa).
To enable Automatic Payables in a project or quote:
- Go to the Finance card of the Smart Project or Smart Quote in question.
- Click on the Gears Icon in the upper-right corner of the card.
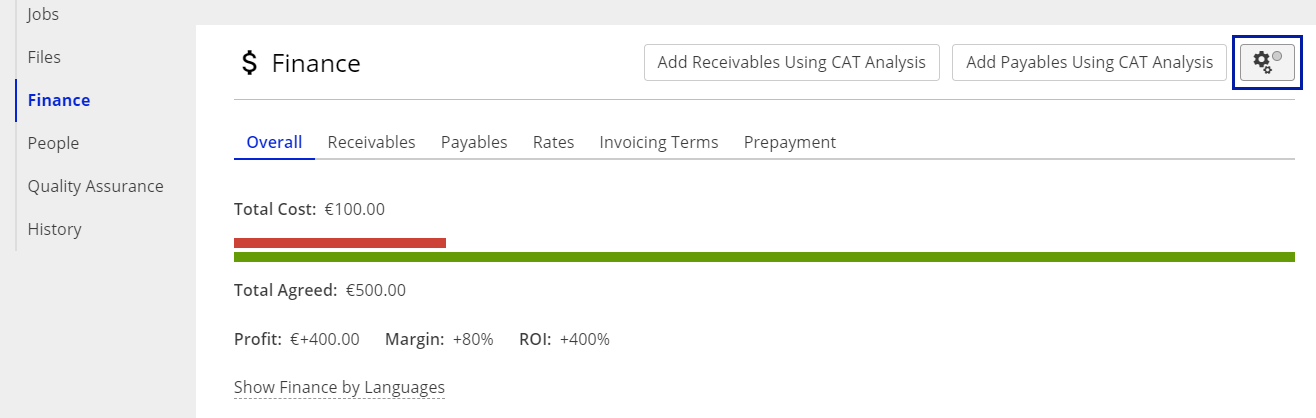
- The Automation Configuration window appears.
- Switch the automation On using the switch in the upper-right corner of the Automatic Payables section.
- Click
 Edit Icon in the Automatic Payables configuration area. Edit Automatic Payable window appears.
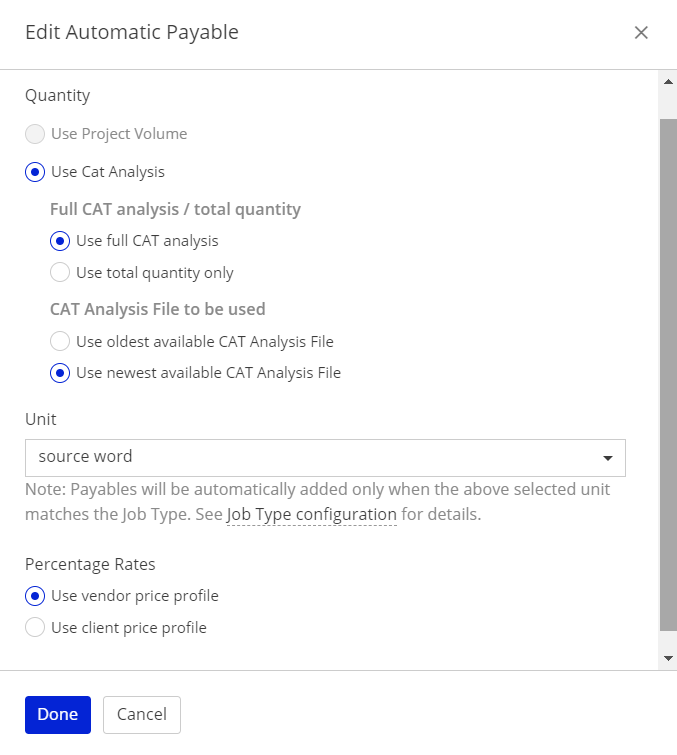
- Set up the Automation's configuration in the following areas:
- Quantity - decide on the quantity using the following options
- Use Project Volume - this feature will be available soon
- Use CAT Analysis - default quantity option for the time being; you can decide whether to use full CAT analysis or total quantity only and whether to use the oldest or the newest available CAT analysis file.
- Unit - select the calculation unit from the drop-down list. Note that Payables will be added automatically only when the selected unit matches the Job Type.
- Precentage Rates - decide if you want to use vendor or client Price Profile to adjust precentage rate values for repetitions, full and fuzzy matches.
- Quantity - decide on the quantity using the following options
- Click Apply changes button to save your changes.

Customer support service by UserEcho