How to create an API token?
This is an old version of the article. Please check the actual version in our new Knowledge Base.
The XTRF API token is a magic string that enables a connection to the Home Portal API on behalf of the user that generated the token. The user may generate as many tokens as they need.
Tokens can be invalidated at any time: it will take immediate effect and connection by means of the invalidated token will be terminated right away. Once invalidated the token cannot be restored. Since a token enables connection to the API on behalf of a user, it only grants rights to that user.
Token creation
To create a token in XTRF:
Navigate to My Account in the upper right menu and select “access token” tab. If you cannot see this tab, the API may not be active on your XTRF instance. Contact XTRF sales/support to activate it.

- Click on Edit.
- Click on Generate Access Token.
- COPY your token (ctrl+c), because it is not possible to access it later.
- Optionally, add a token description, so you know what purpose the token serves, e.g. "testing Google Drive connection".
- Click on Save.
DONE, your token is now in your clipboard - and can be pasted wherever you need to use it.
Security Warning
Anyone who knows your token will be able to use your API and operate in your XTRF with the above mentioned user's privileges.
You can invalidate a token by pressing the ![]() Trash Icon in the Delete column on the token list.
Trash Icon in the Delete column on the token list.
Best practices
It is recommended to create a dedicated user, e.g. with "api-user" name that belongs to a dedicated "api-group" with rights limited only to those required by the integration scenario you develop.
Creating a User Account
While creating a User Account you need to assign the user to a given user group. It is recommended to first a create a user group and then assign users to it. It allows you to manage user group rights in a flexible and convenient way.
For example: if you want to use this account to later set up a connection between XTRF Language Business Platform and Google Sheets, it is recommended to create an abstract account for that. Having an abstract account enables you to customize data which is supposed to be transferred to Google Sheets according to the requirements specified by your associate. This also gives you more control over the data you want to transfer, so all confidential information is protected. What is more, within the approach of using XTRF Smart Views Add-On, it is suggested to create an account with only browse and display rights: that gives your associate the ability to export data to Google Sheets, but also prevents from making any changes in the XTRF Platform.
Creating a User Group
- Sign in to the Home Portal of XTRF Platform.
- Click on the
 Configuration Menu > User Management > User Groups and Rights.
 - Click on the +Add button to add a new group.
- In the 'Name' field provide a unique name of a group. In this guide the Add-On User Group is provided.
- Select the Active checkbox, so the new group is able to use options which you're going to configure in the Home Portal.
- In the permission matrix assign the Browse and Display access rights to the group which is being created:
- Select the All button in the Browse column.
- Select the All button in the Display column. If the user group is only supposed to browse and display rights, the rest of the checkboxes should remain unselected.
- Click on the Save button. You have created the user group where users can display and filter data in the Home Portal.
Creating a User
The following steps present how to create an abstract user account, where the username, as well as the first and last name, are provided as impersonal ones. To do so, perform the following steps:
- Click on the
 Configuration Menu > User Management > Users.
 - Click on the +Add button. You are redirected to the 'General Info' tab in the 'Create Users' display.
- In the Username field provide a unique username which should be used for the new user to sign in to the Home Portal. In this guide the addonuser username is provided.
- In the First Name field provide the first name of the new user. For example, the Add-On name is provided.
- In the Last Name field provide the last name of the new user. For example, the User name is provided.
- In the E-mail Address field provide an e-mail address. As you're creating an abstract account to enable external users to gain access to display data in the Google Sheets, you can provide your own email address. All notifications from the Home Portal are going to be sent to this address.
- Select the Active checkbox that the user account can be available in your Home Portal.
- From the Group drop-down menu select the Add-On User Group you have created in the previous section.
- Click on the Change button in the Password section and set it up for the user.
- Click on the Save button. You have created an abstract user account.
Generating an Access Token for the User Account
To enable you or your associate access to the XTRF API, you need to obtain an access token. The access token allows to identify which application is trying to connect to XTRF Platform through API calls within user credentials as defined above.
To generate the access token, perform the following steps:
- Sign in to the Home Portal of XTRF Platform with the user credentials.
- Click on the Configuration Menu > User Management > Users.
- From the list of all Home Portal users select the user for whom you want to generate the access token.
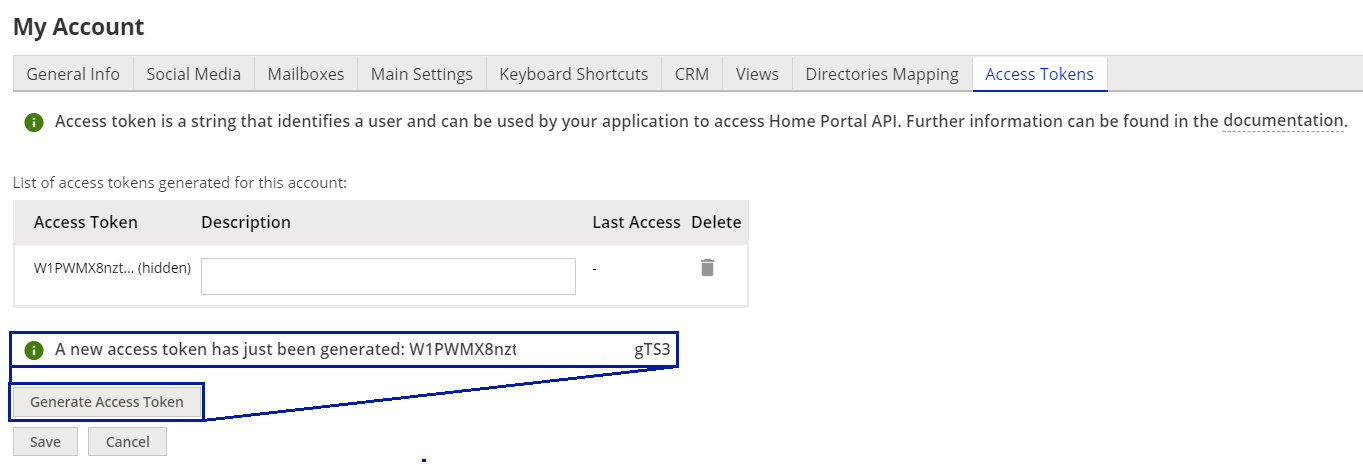
- Select the Access Tokens tab. If the access tokens were generated for this user account in the past, the list of generated tokens is displayed.
- Click on the Edit button.
- Click on the Generate Access Token button to get a new access token. The new access token is displayed.
- You have just generated the new access token. You may use it to integrate your application with XTRF Platform.
Customer support service by UserEcho